A cosy little dwelling, tucked among imagined roots and winding branches… this tree house slowly came to life over a number of thoughtful (and sometimes uncertain!) days.
What began as a collection of humble finds soon turned into something rather magical.
The Making of Brambly Hedge Tree House

Chapter 1 –
The Construction of the Base
Day 1 – A Long and Thoughtful Beginning (6 hours)
This was, without a doubt, the trickiest part of the whole process.
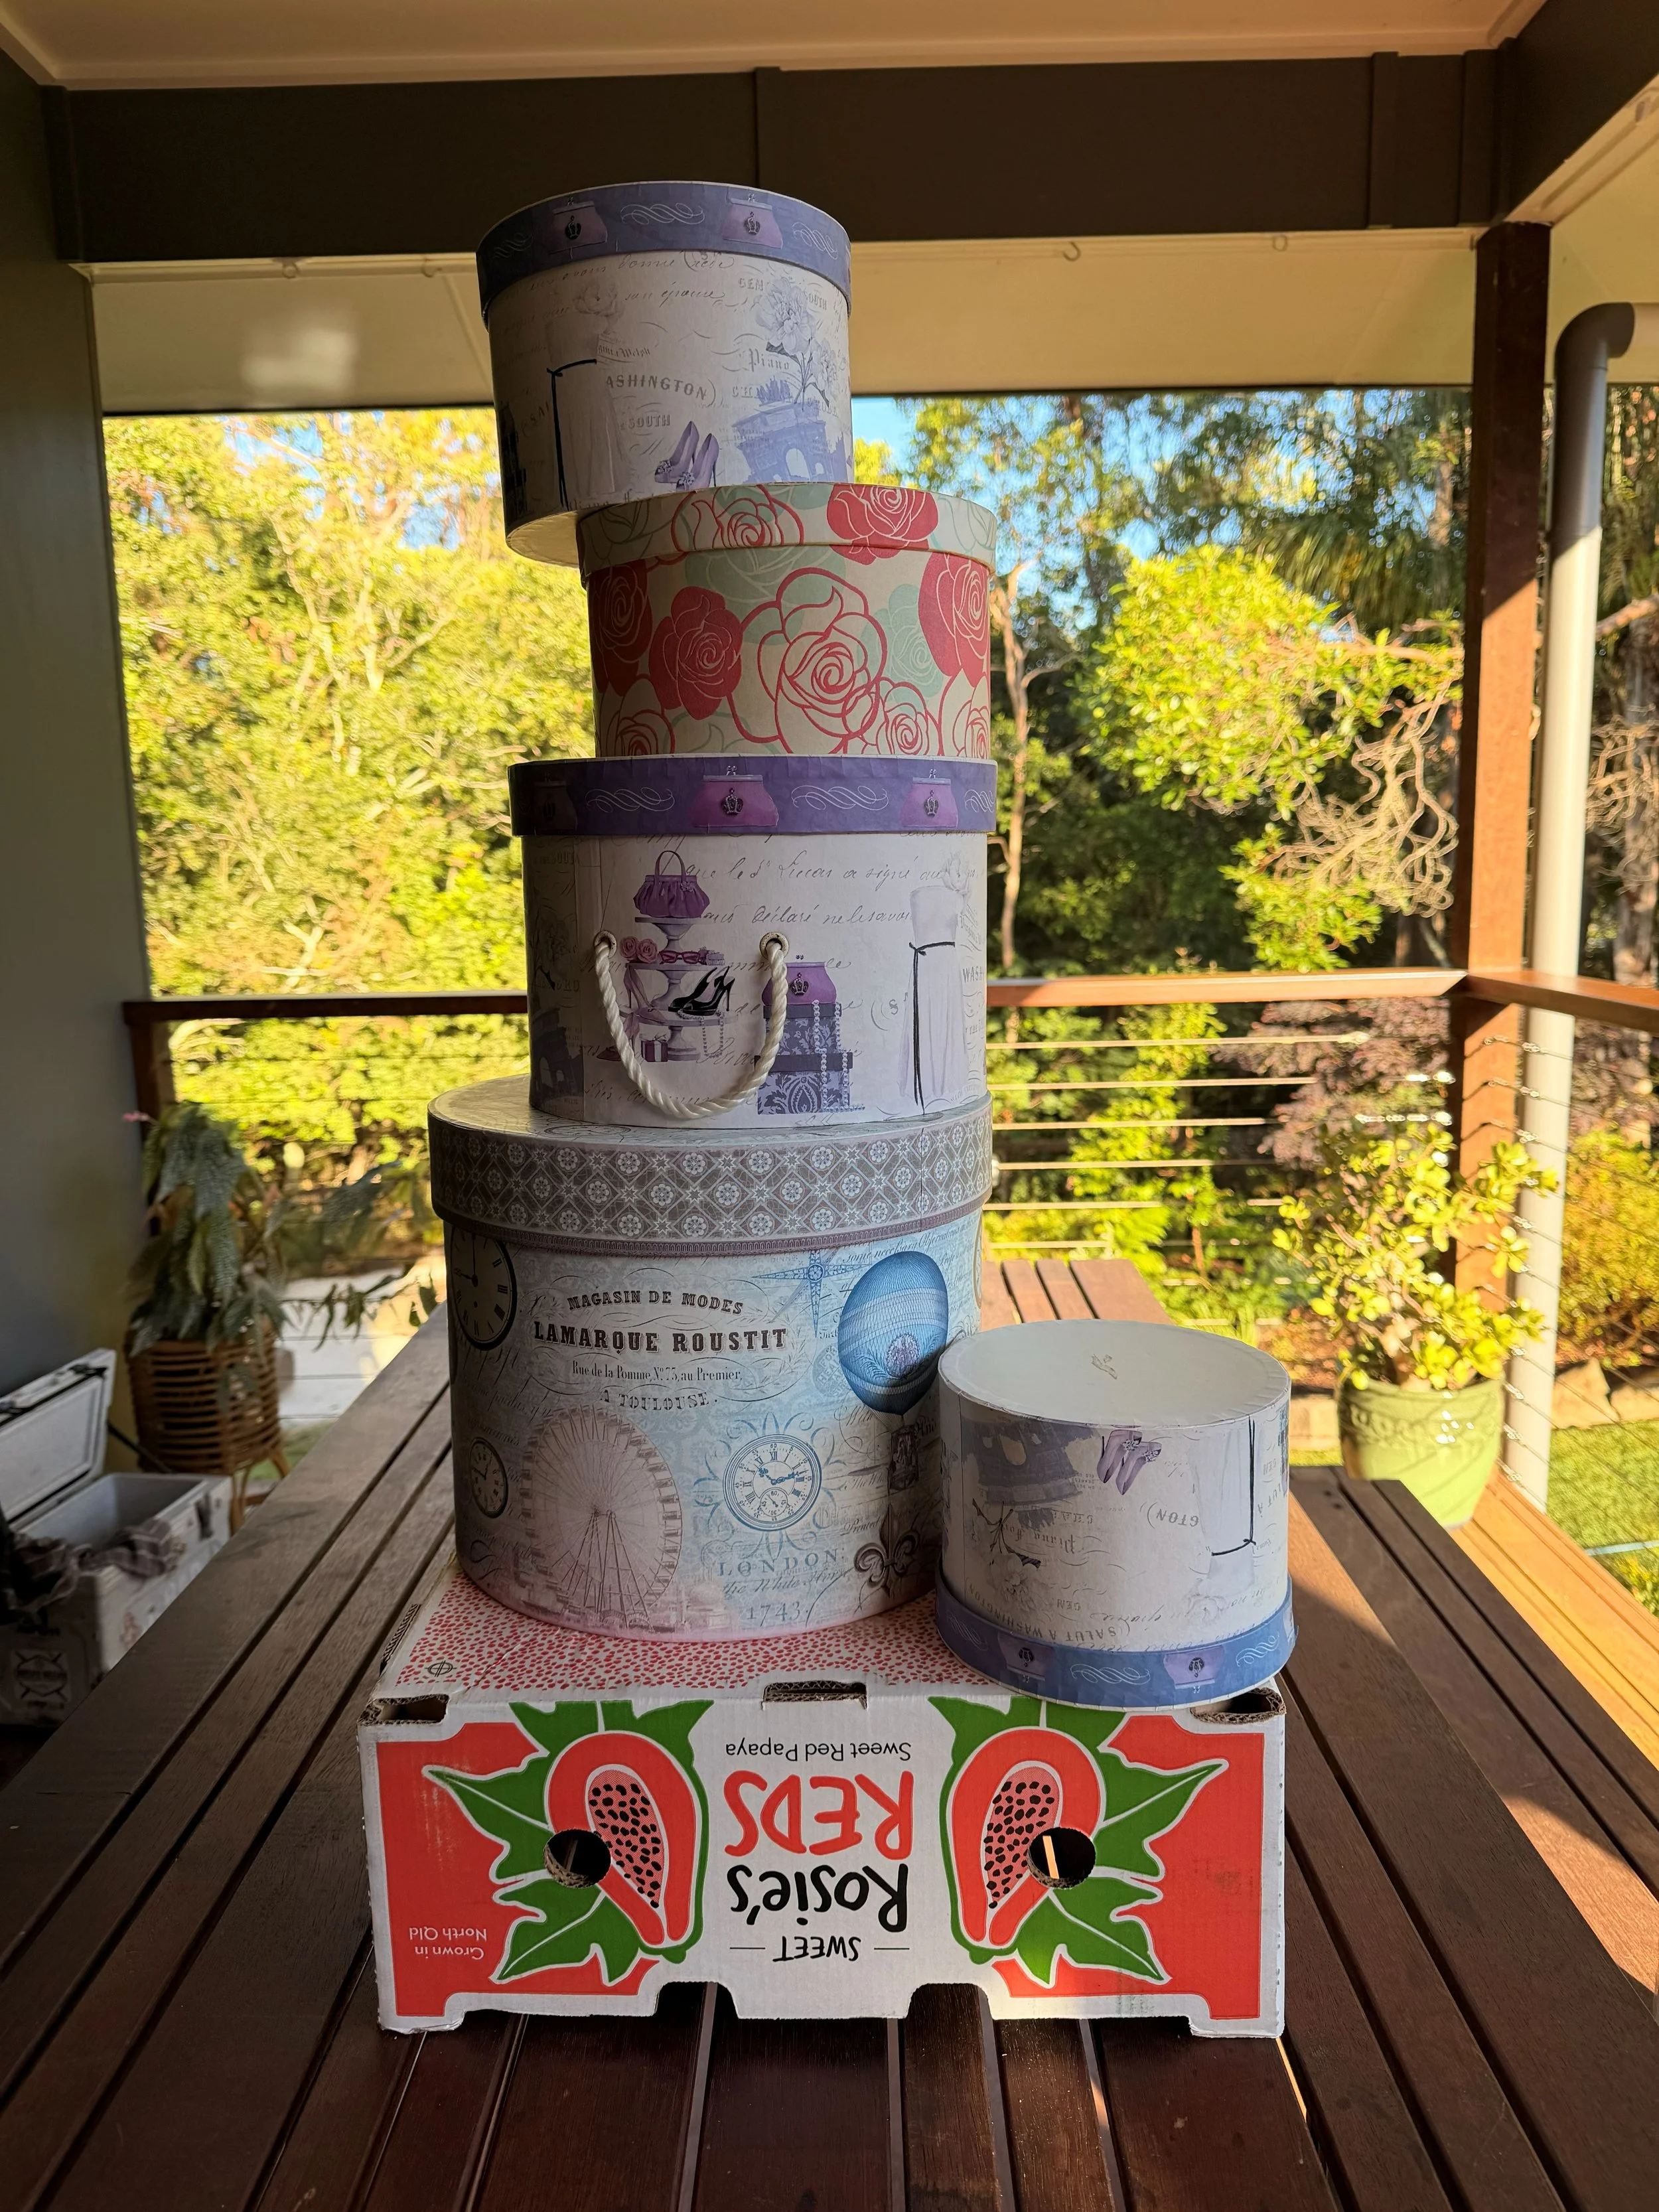
Silly, really—but choosing the right hat boxes from the op shops proved far more difficult than expected. Should I get this one? Will I find a better size? Will they fit together just right? In the end, I found three in one shop and decided to trust the process. Later, I came across two more and added them to the collection.
A gentle tip: don’t overthink it as I did… it truly does all fall into place.
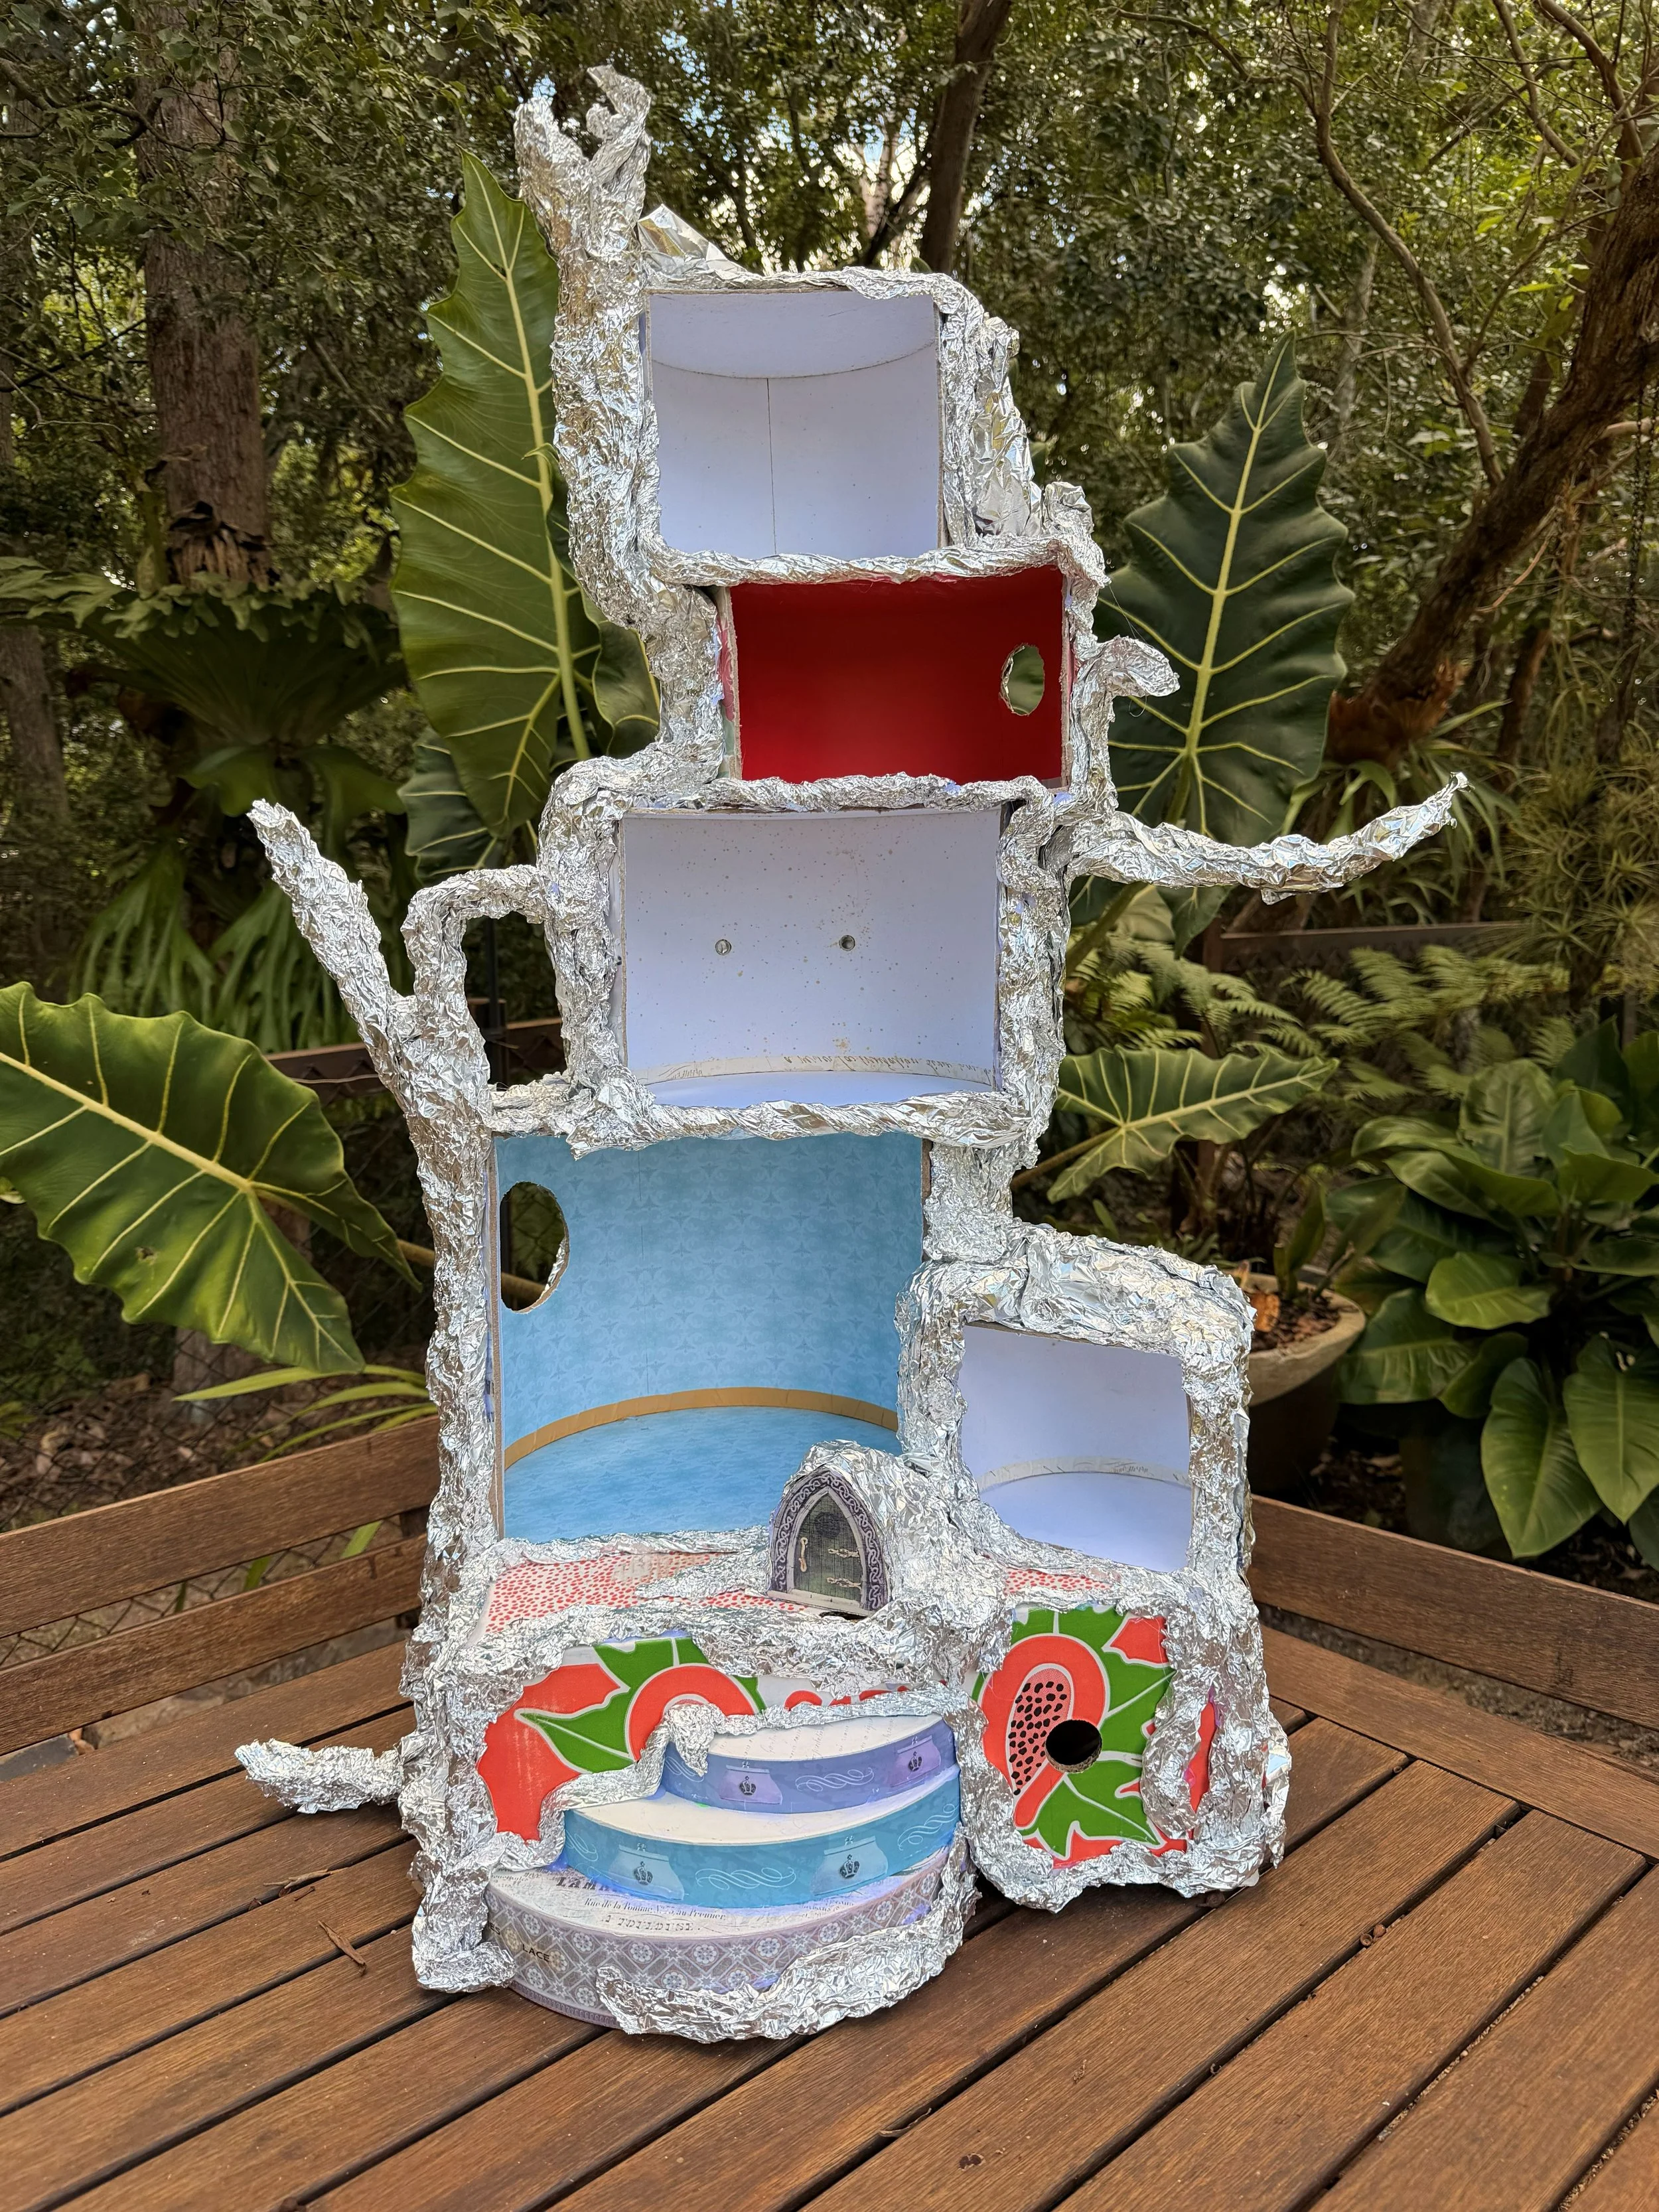
For the base, I used an old box with handles—perfect for moving the tree house about as it grew. I arranged the hat boxes on top and began to imagine how it might all come together.
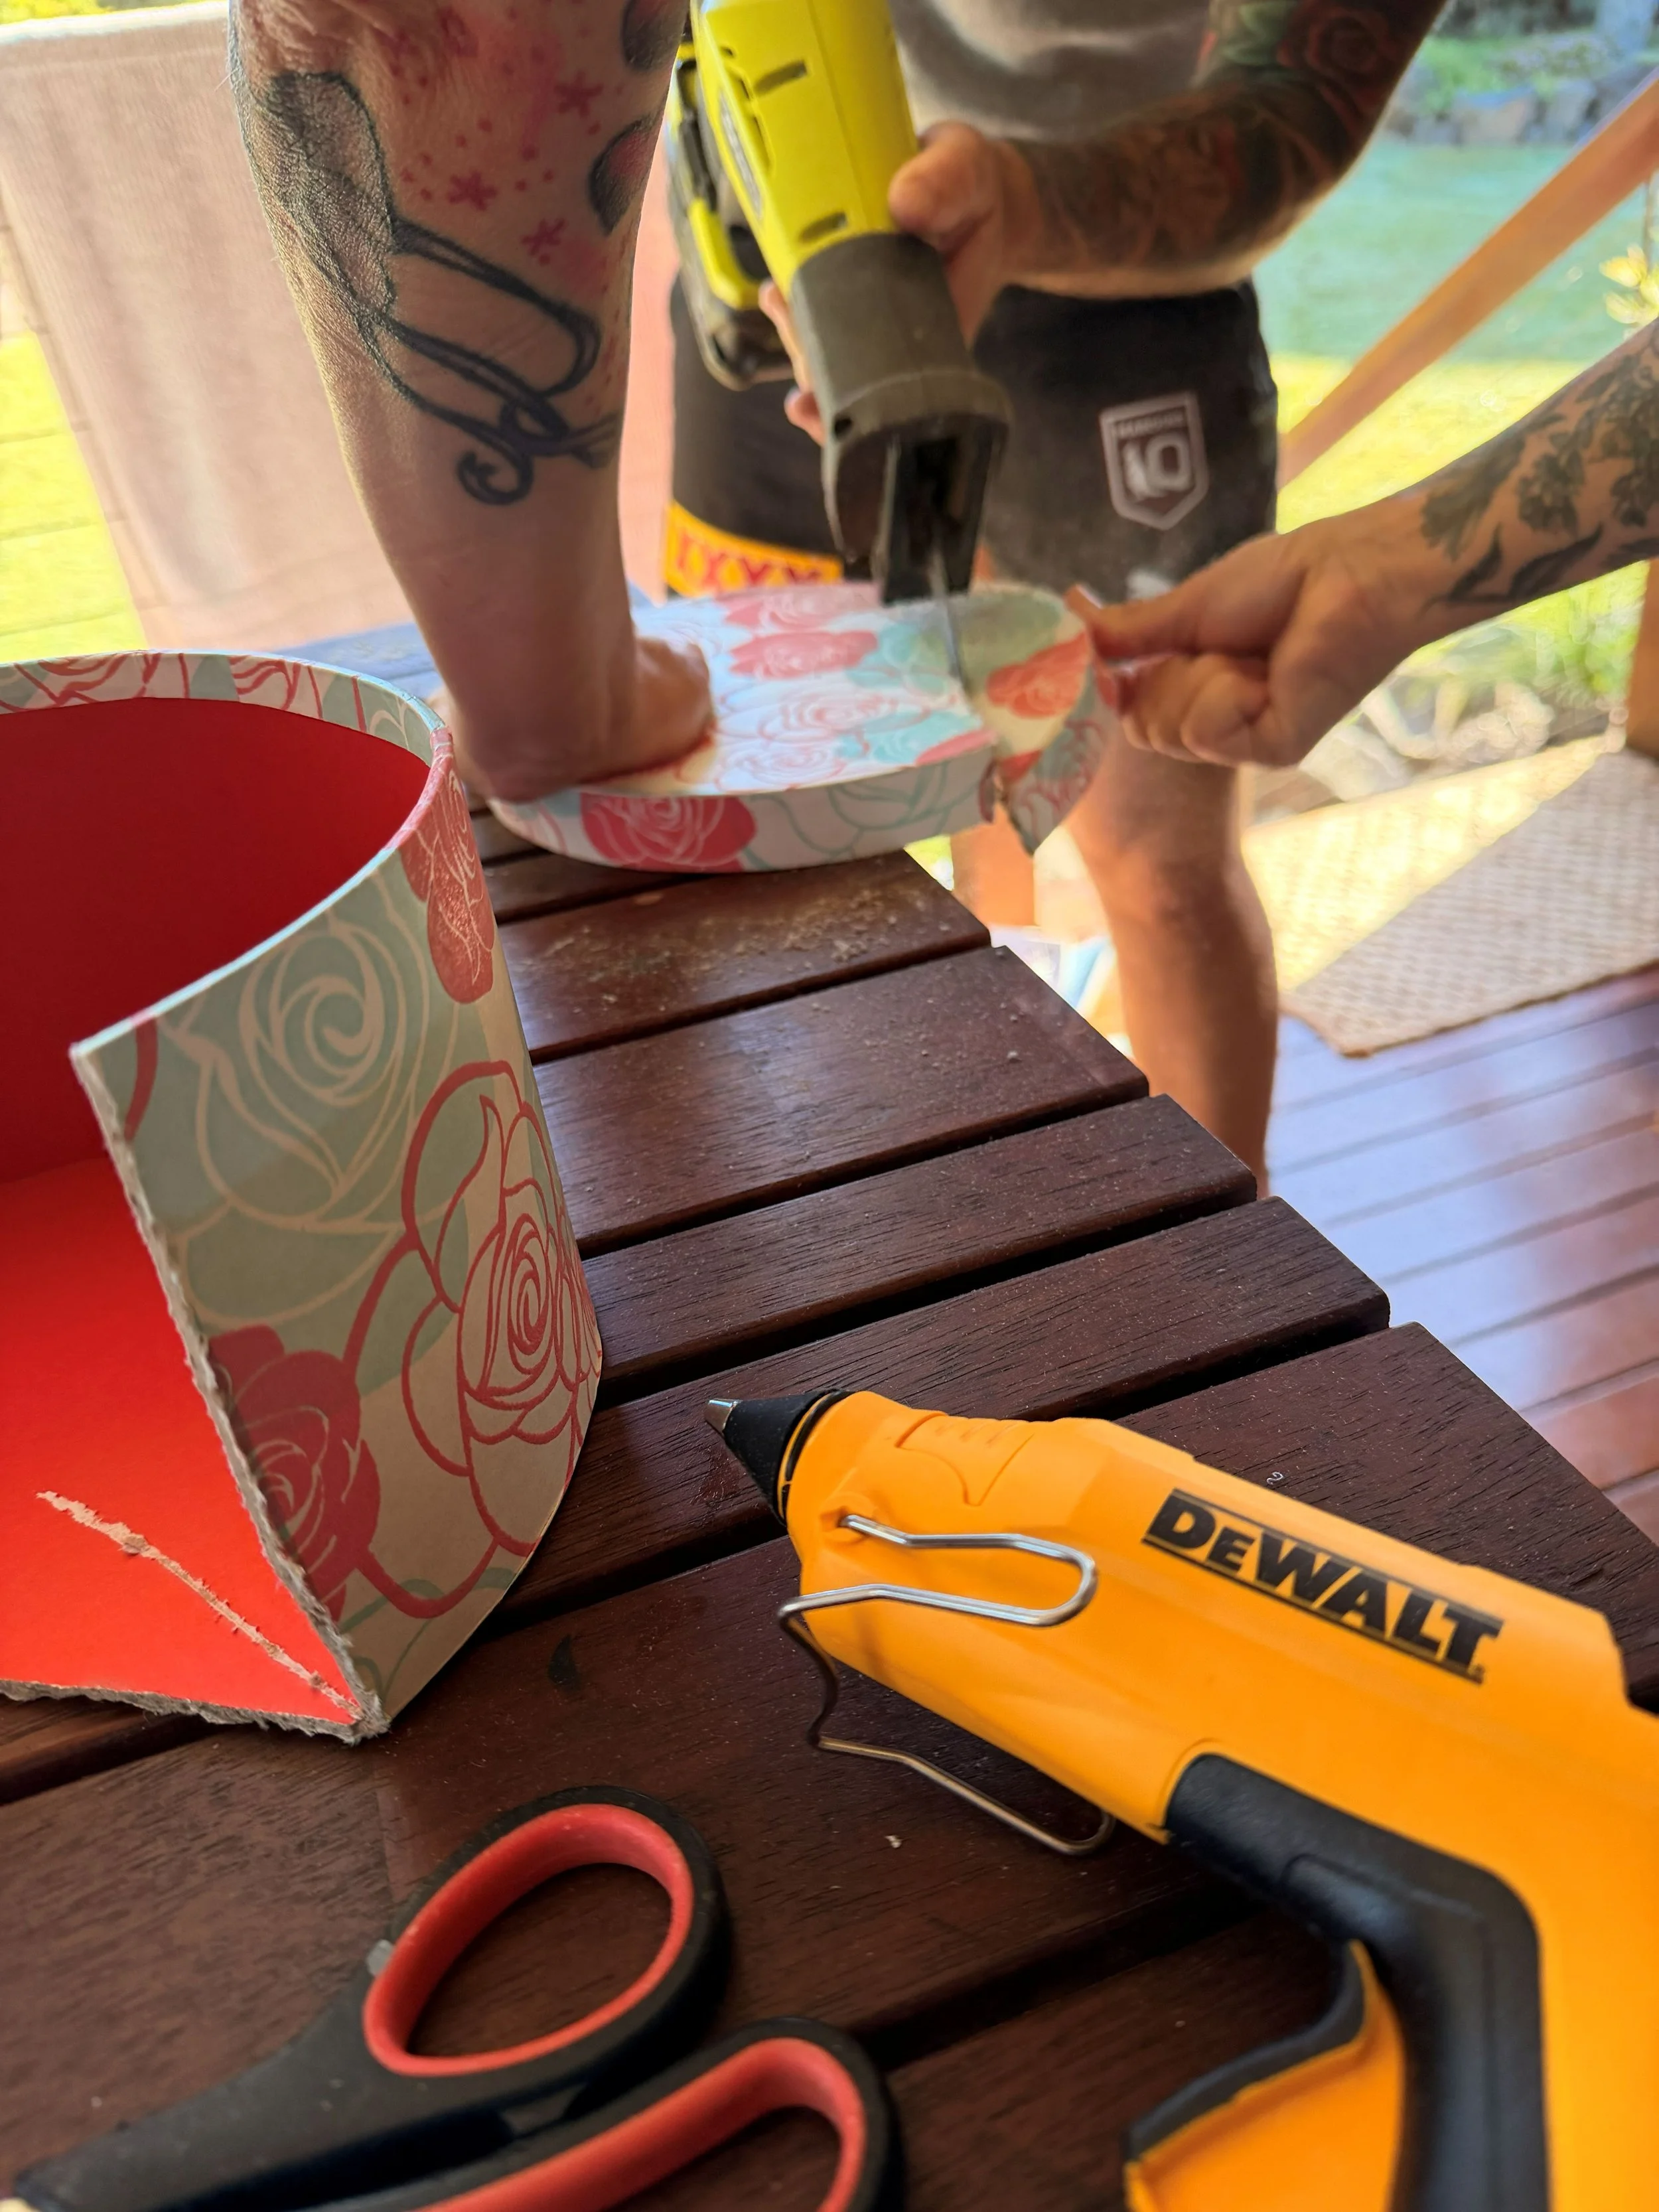
Then came another moment of hesitation… Would a reciprocating saw even work? What if we made a mistake? With a little courage (and help from my husband), we made the cuts—and thankfully, everything worked beautifully. The offcuts even found new purpose as charming little steps leading up into the tree house. A happy accident!
I glued the boxes together using a hot glue gun (a good-quality one is well worth it). The glue sets quickly, so it helps to work with intention. I used a pencil to guide where the glue should go.
Shaping the Tree
Next came the transformation.
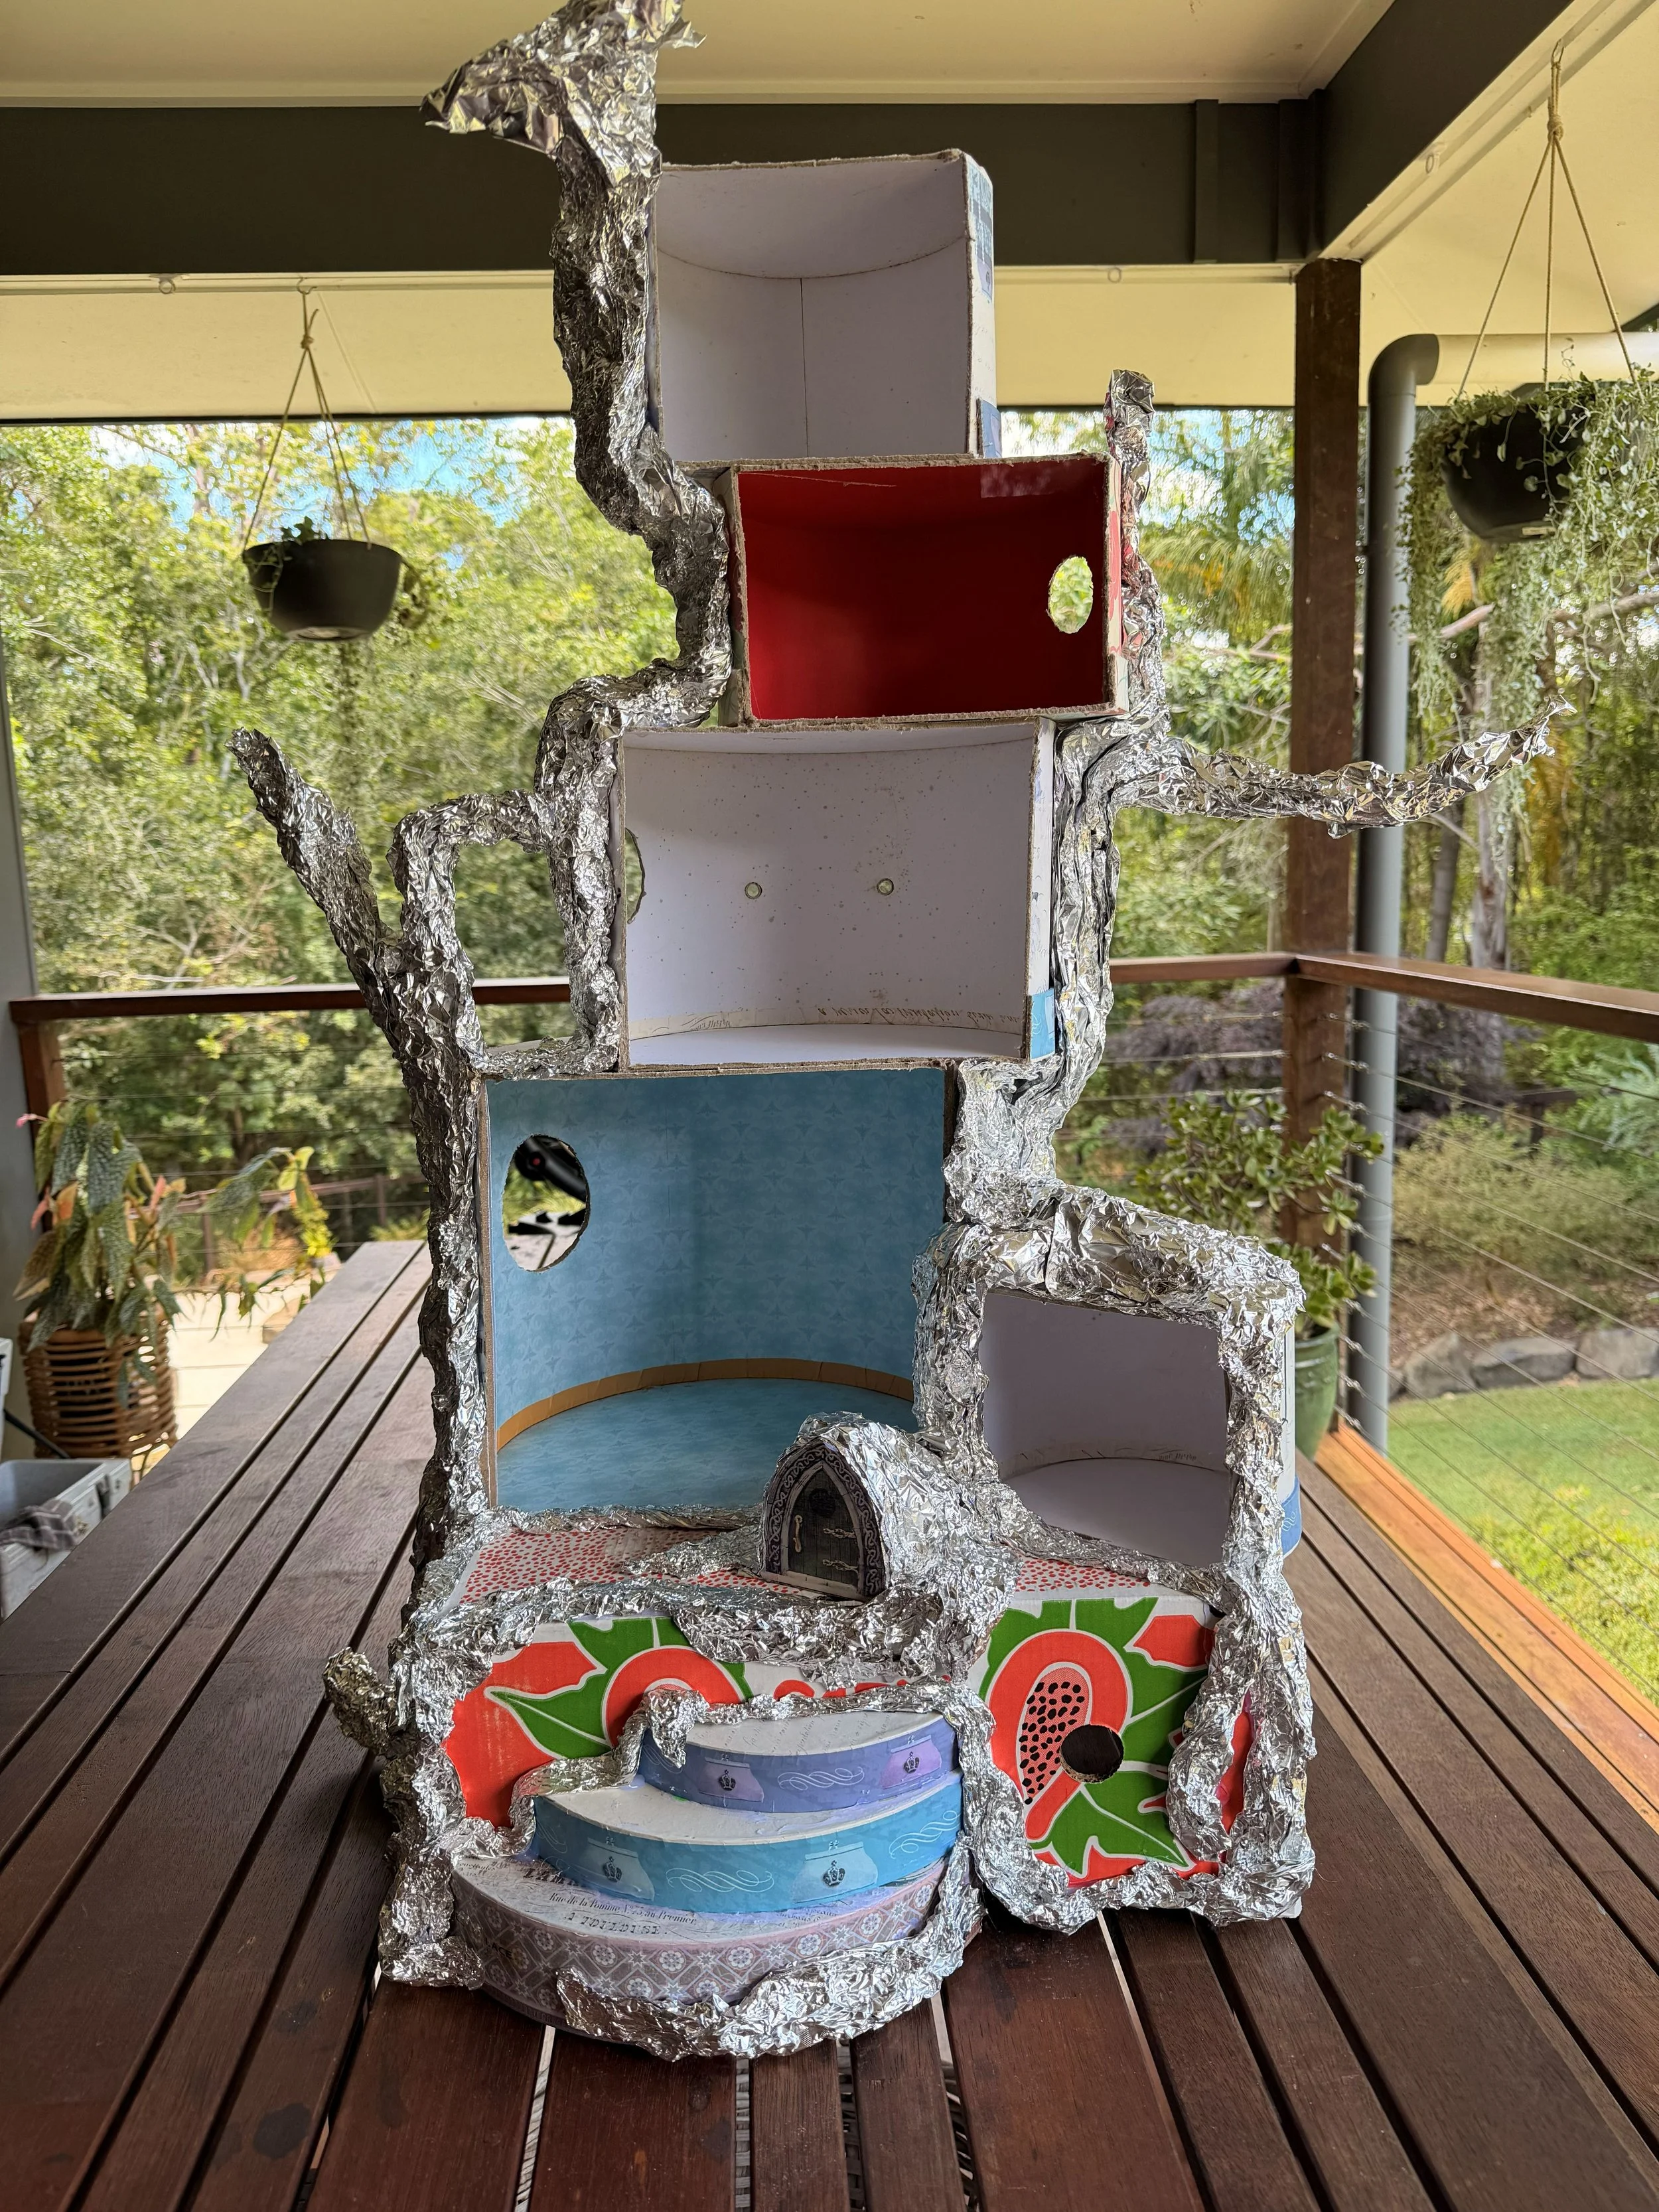
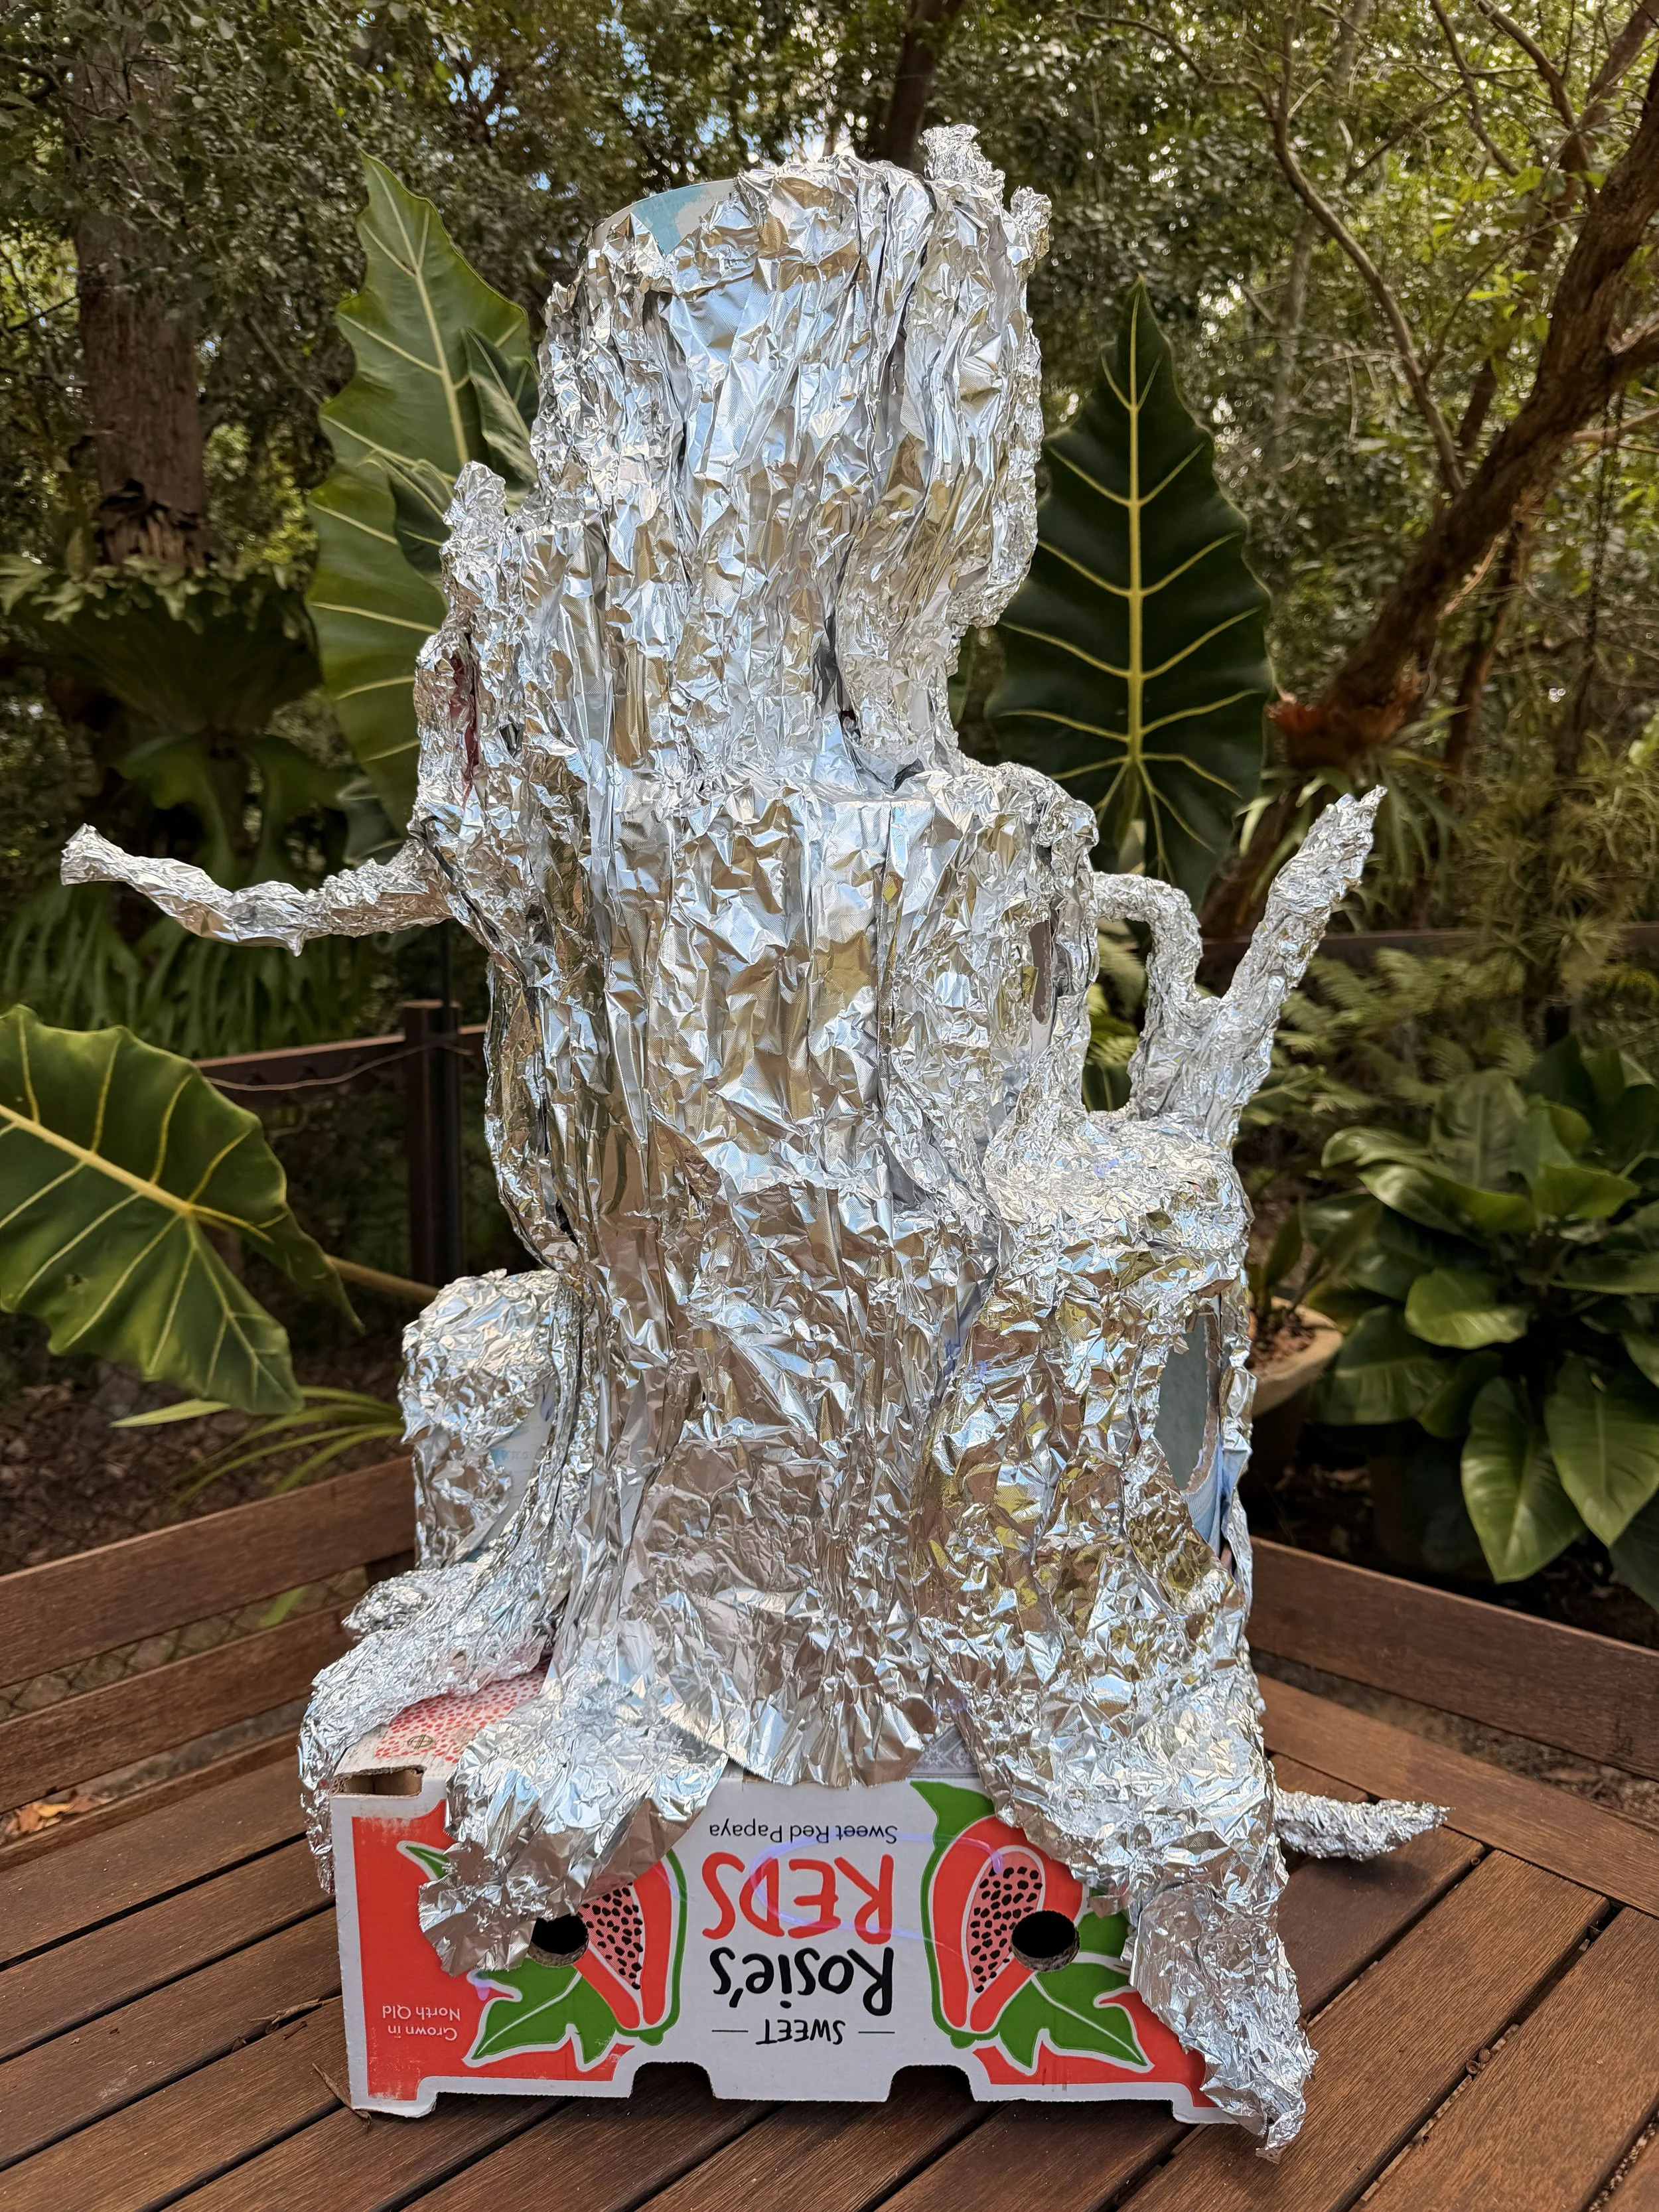
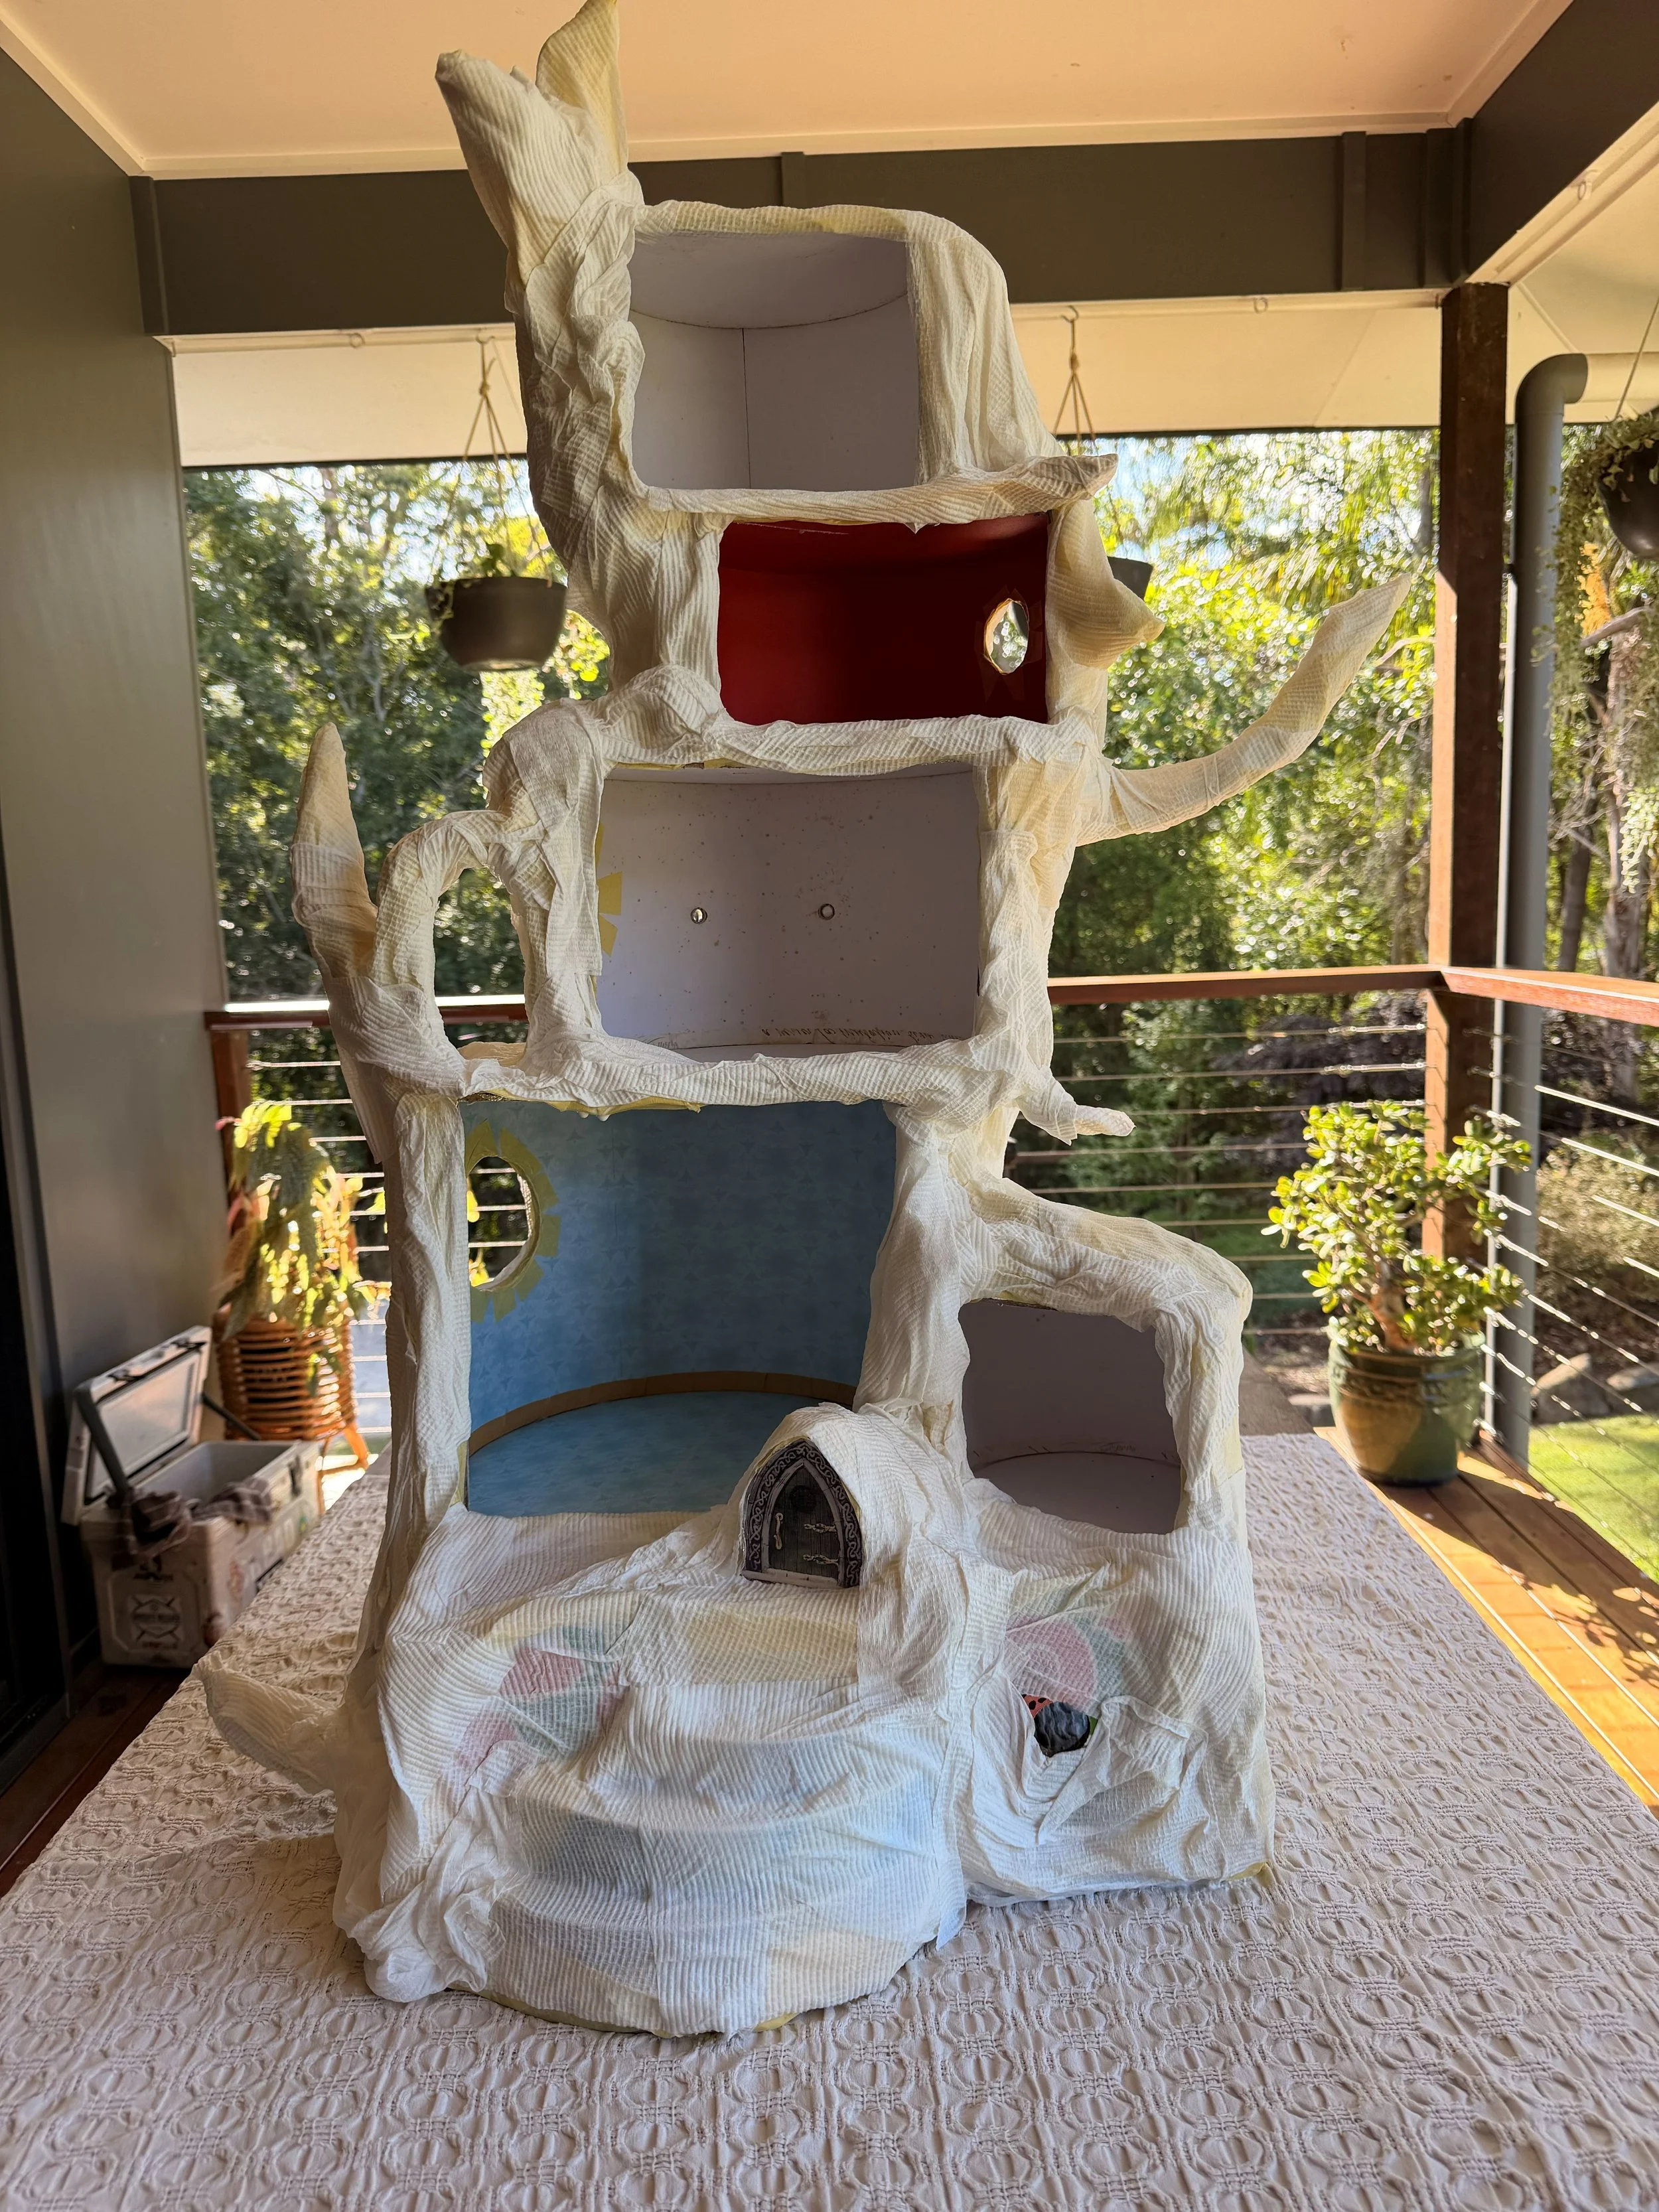
Using aluminum foil, I measured the height of the tree house and layered three sheets together, gently crumpling them to resemble bark and roots. These were pressed into place, removed, then quickly hot glued onto the structure. Branches were added here and there, along with a little nook for a swing I had imagined. I softened the edges so the structure no longer resembled stacked boxes, but something more organic—like it had grown there over time. A tiny door was nestled into place, with cardboard and paper towel tucked behind it to give it depth and sturdiness.
Adding Texture
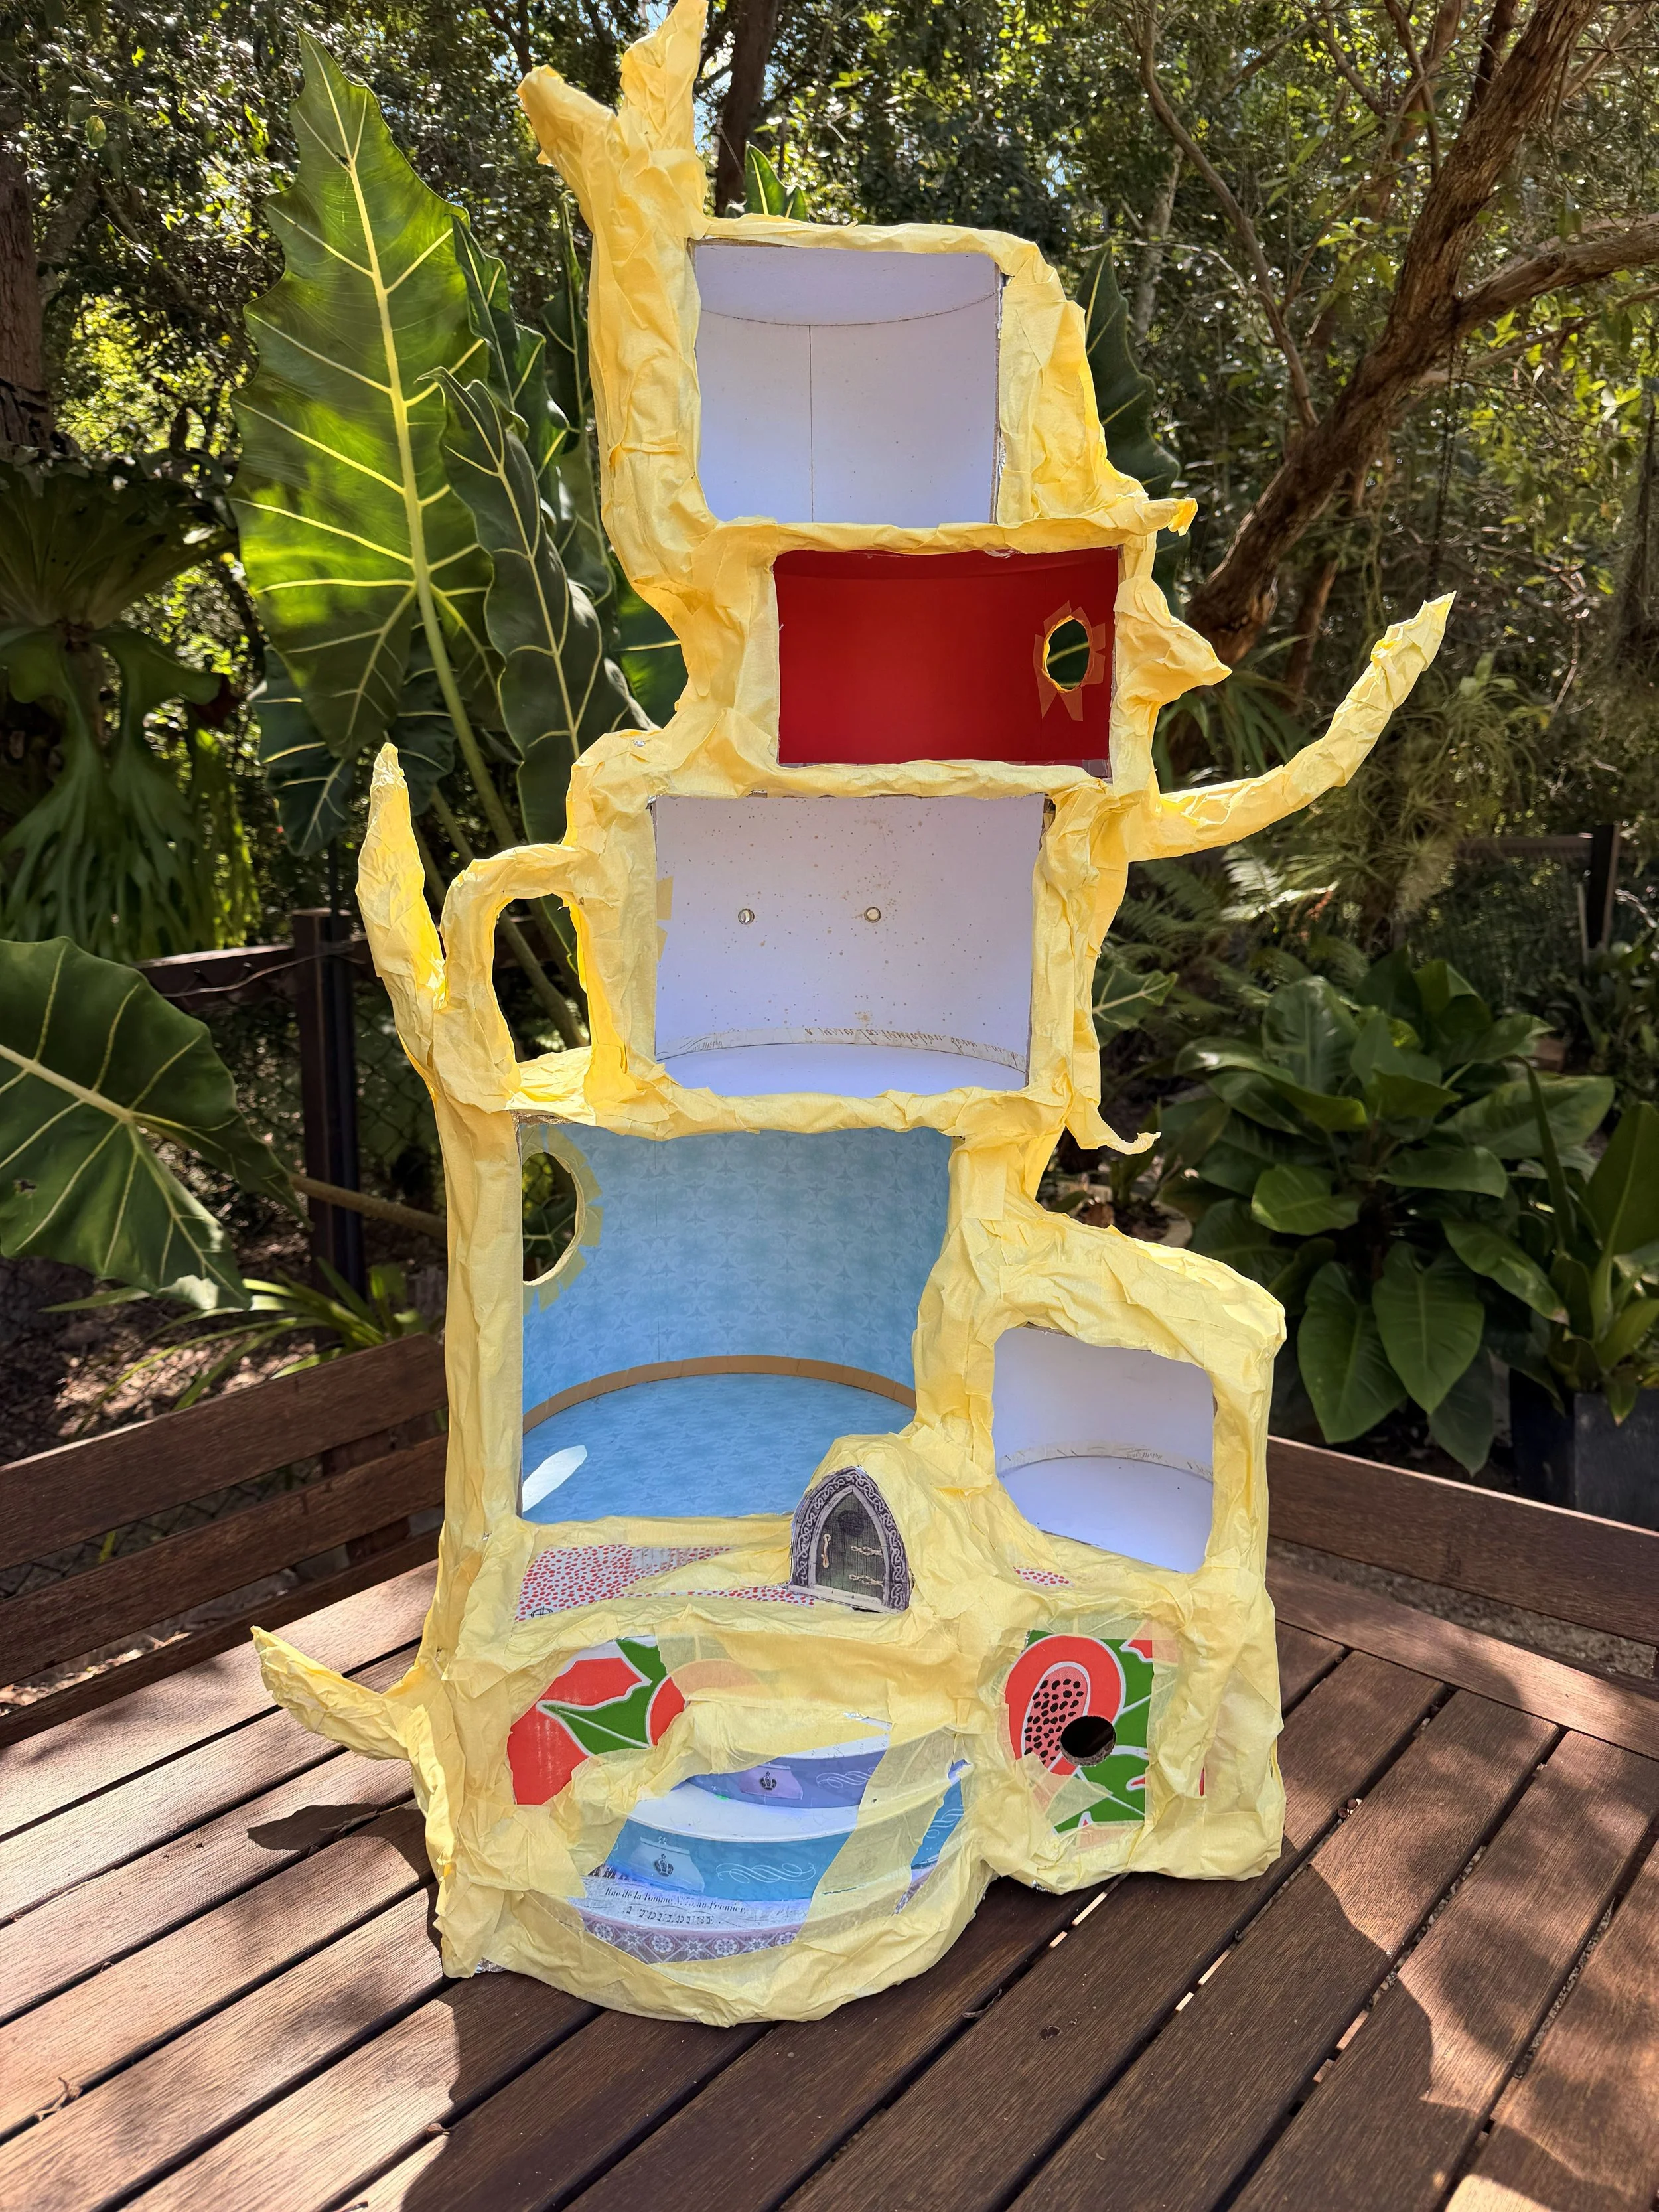
Masking tape was then carefully layered over the foil—especially around windows—to soften edges and refine the shape. Starting from the top and working down, I pressed it firmly into place using my nails. At this point, a quiet confidence began to grow… this might actually work.
Creating the Bark
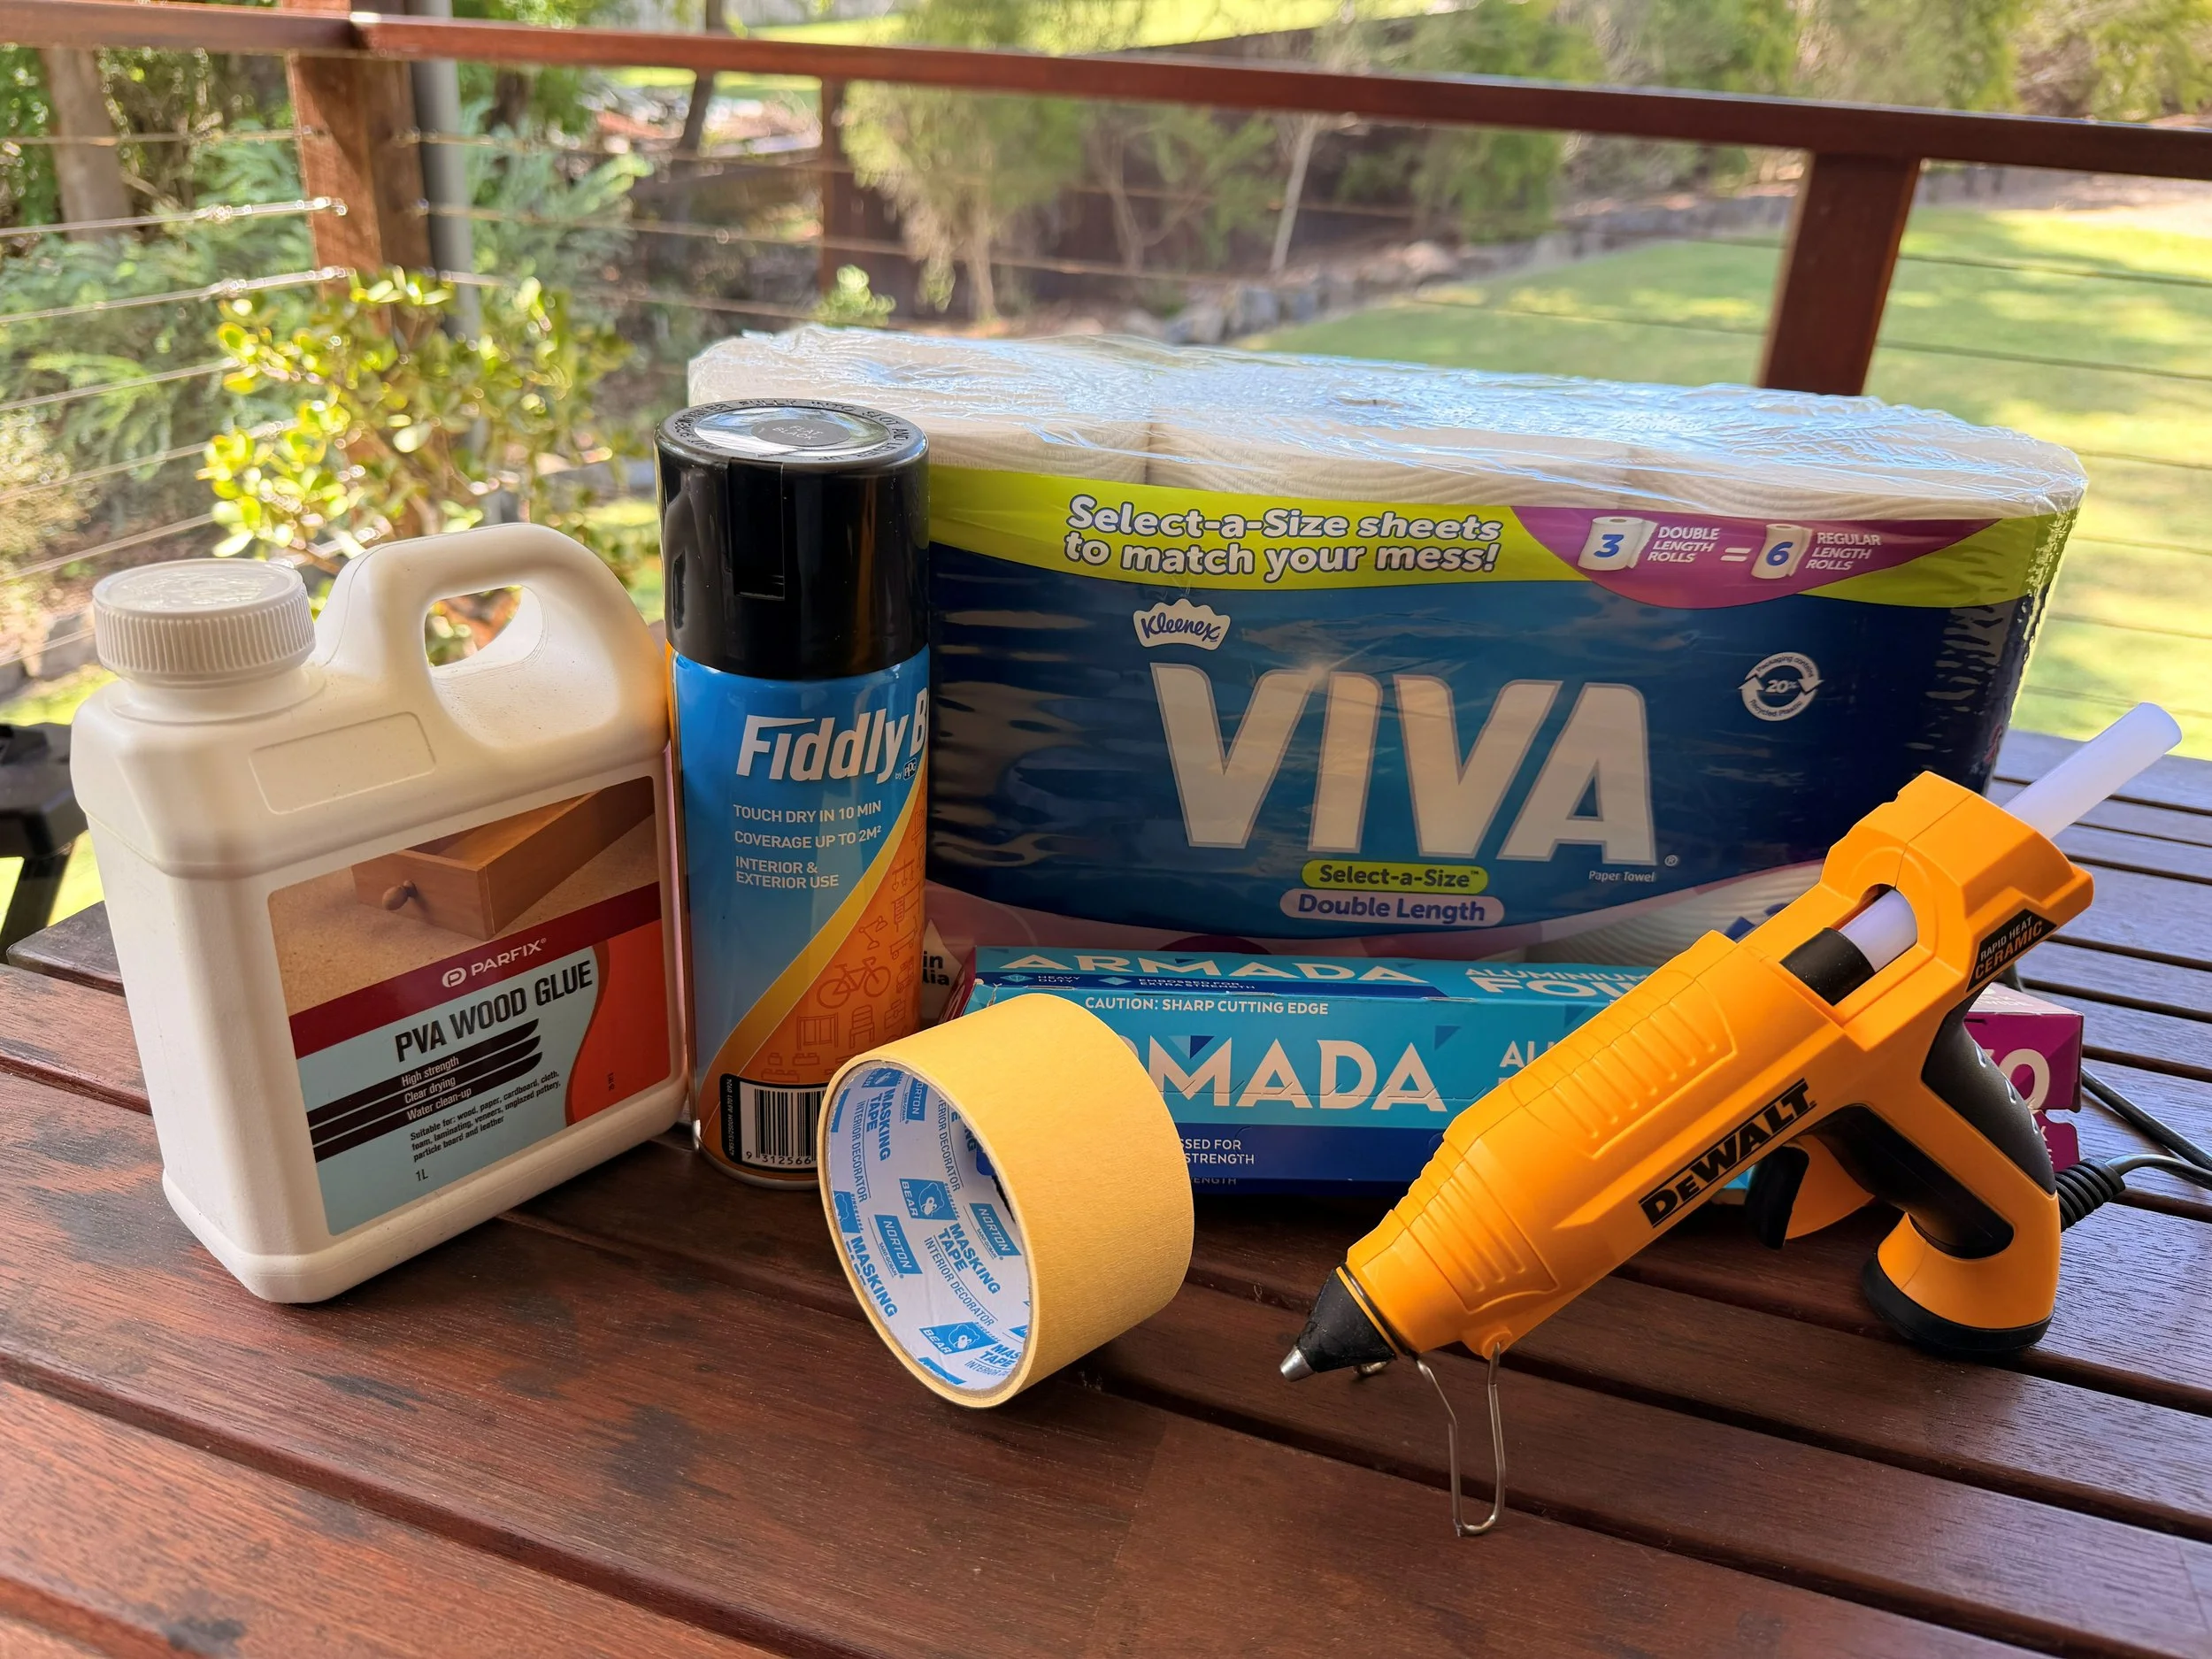
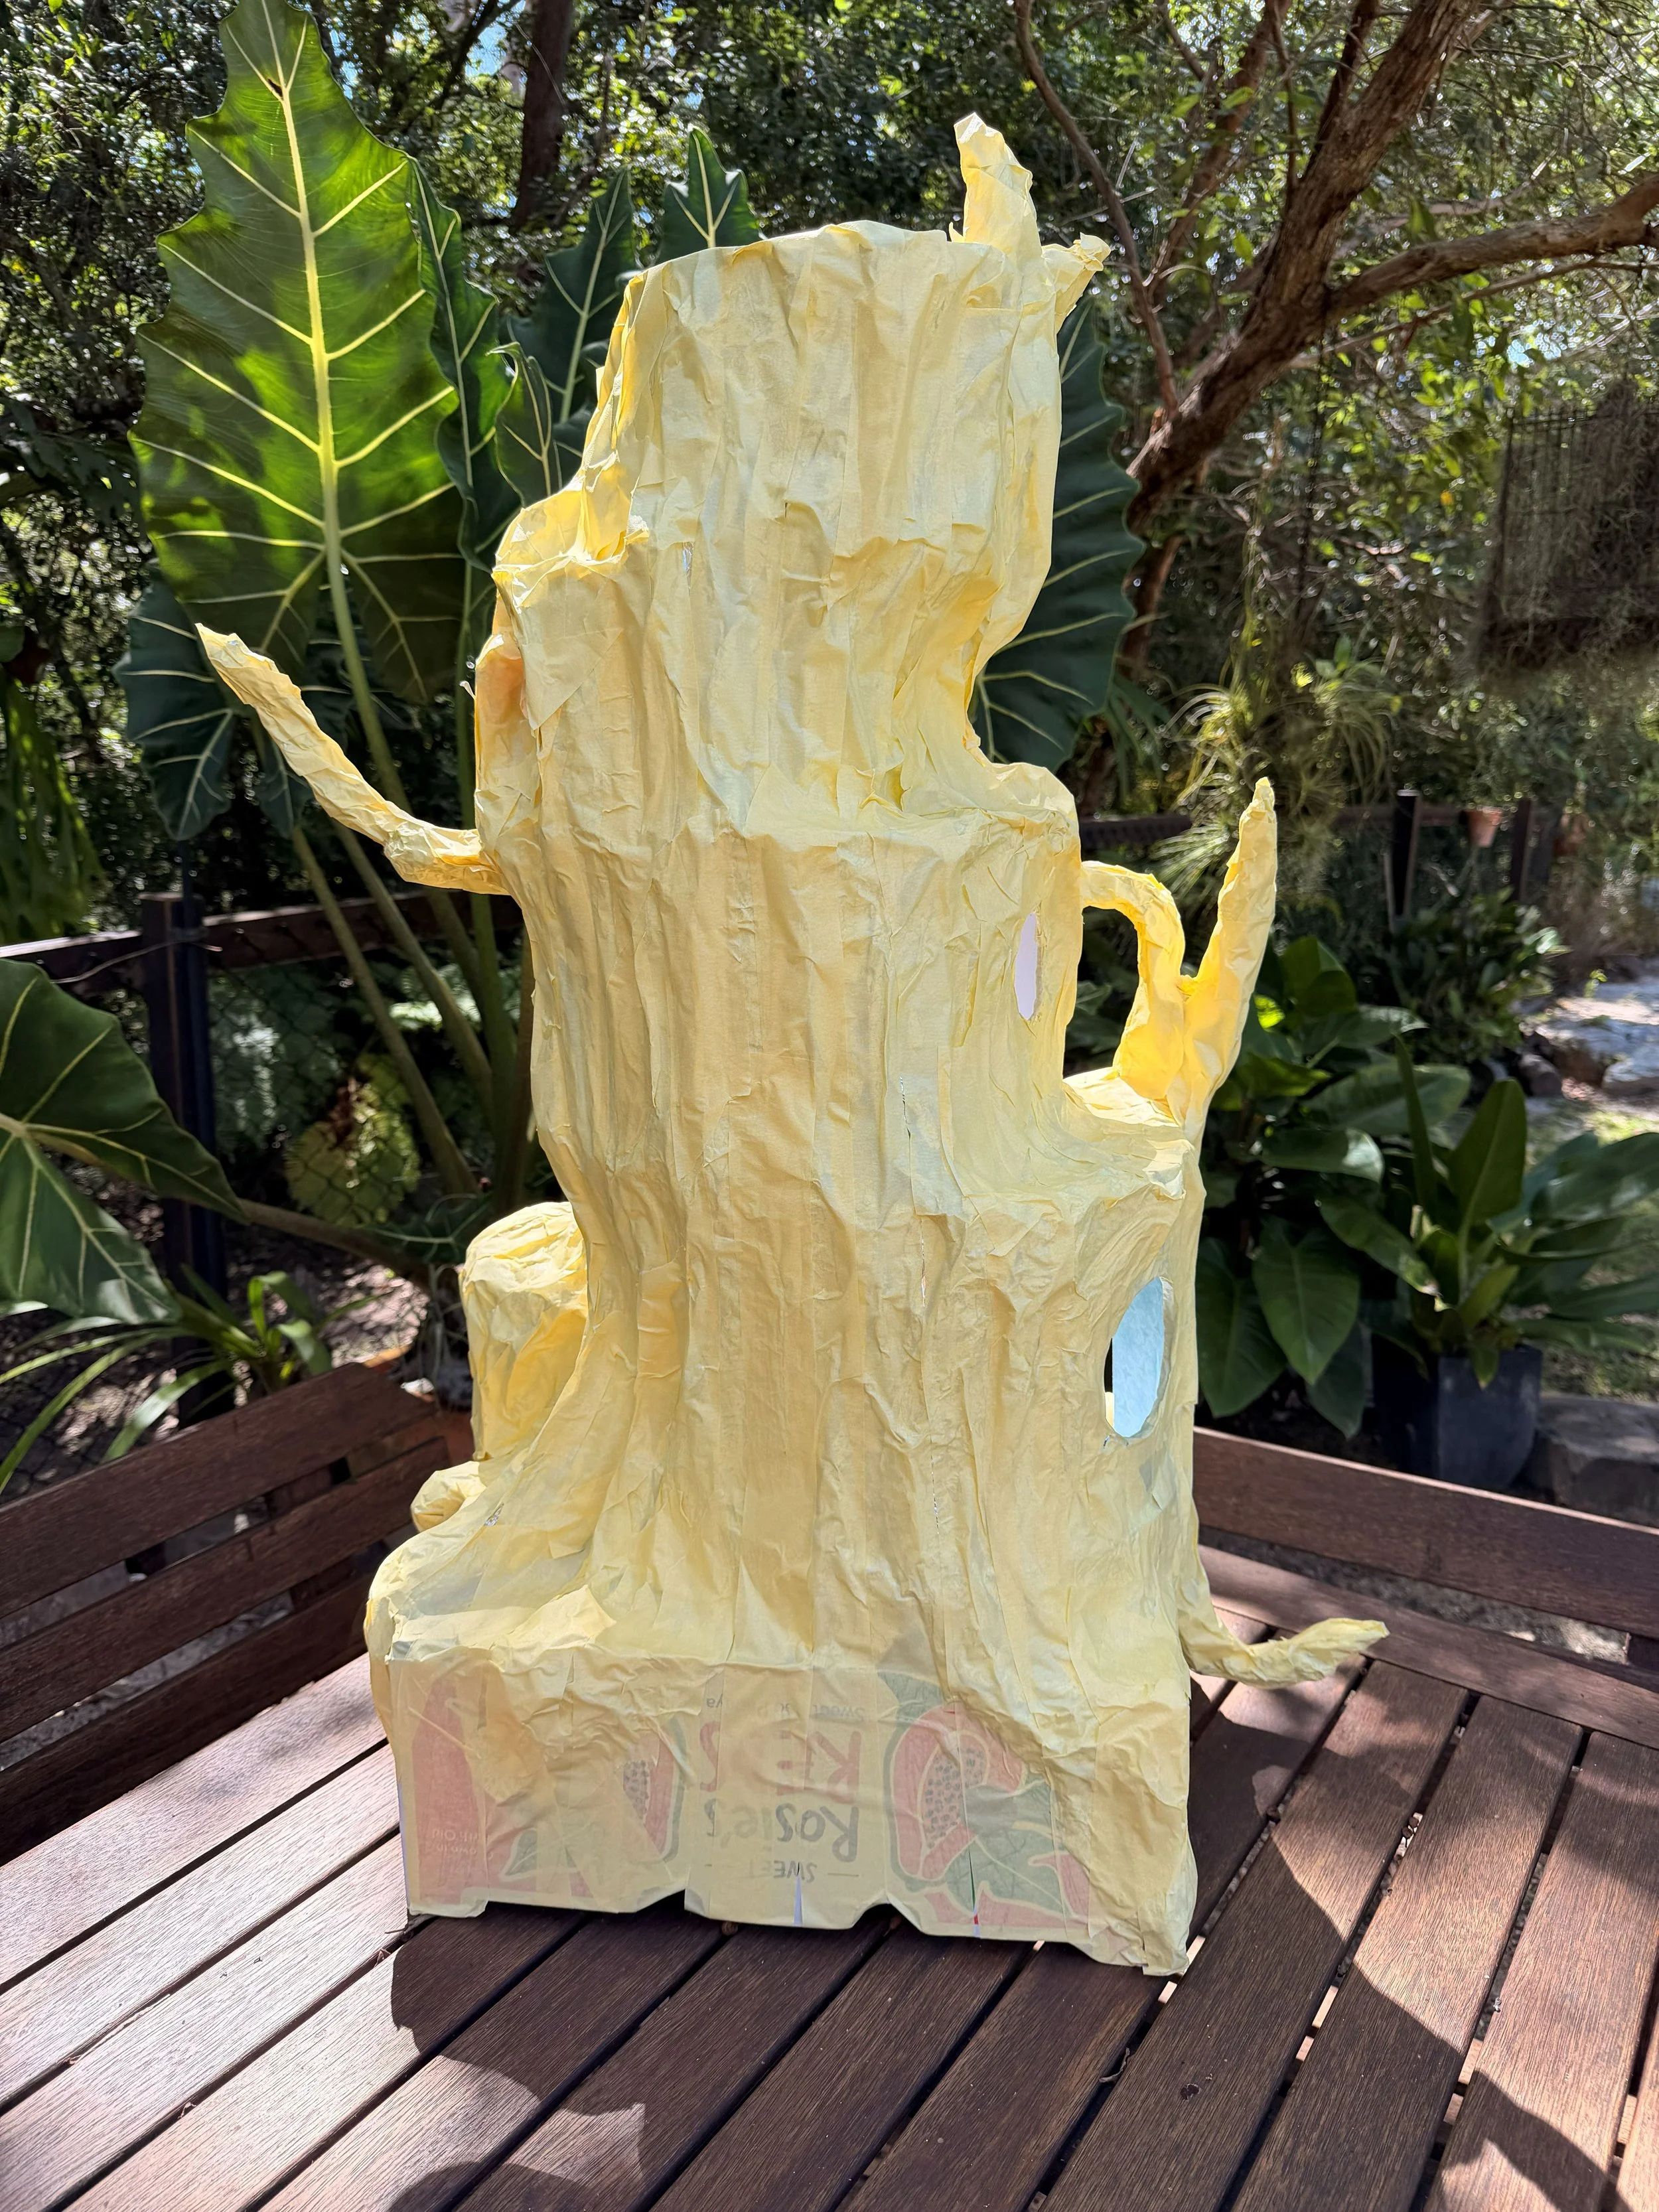
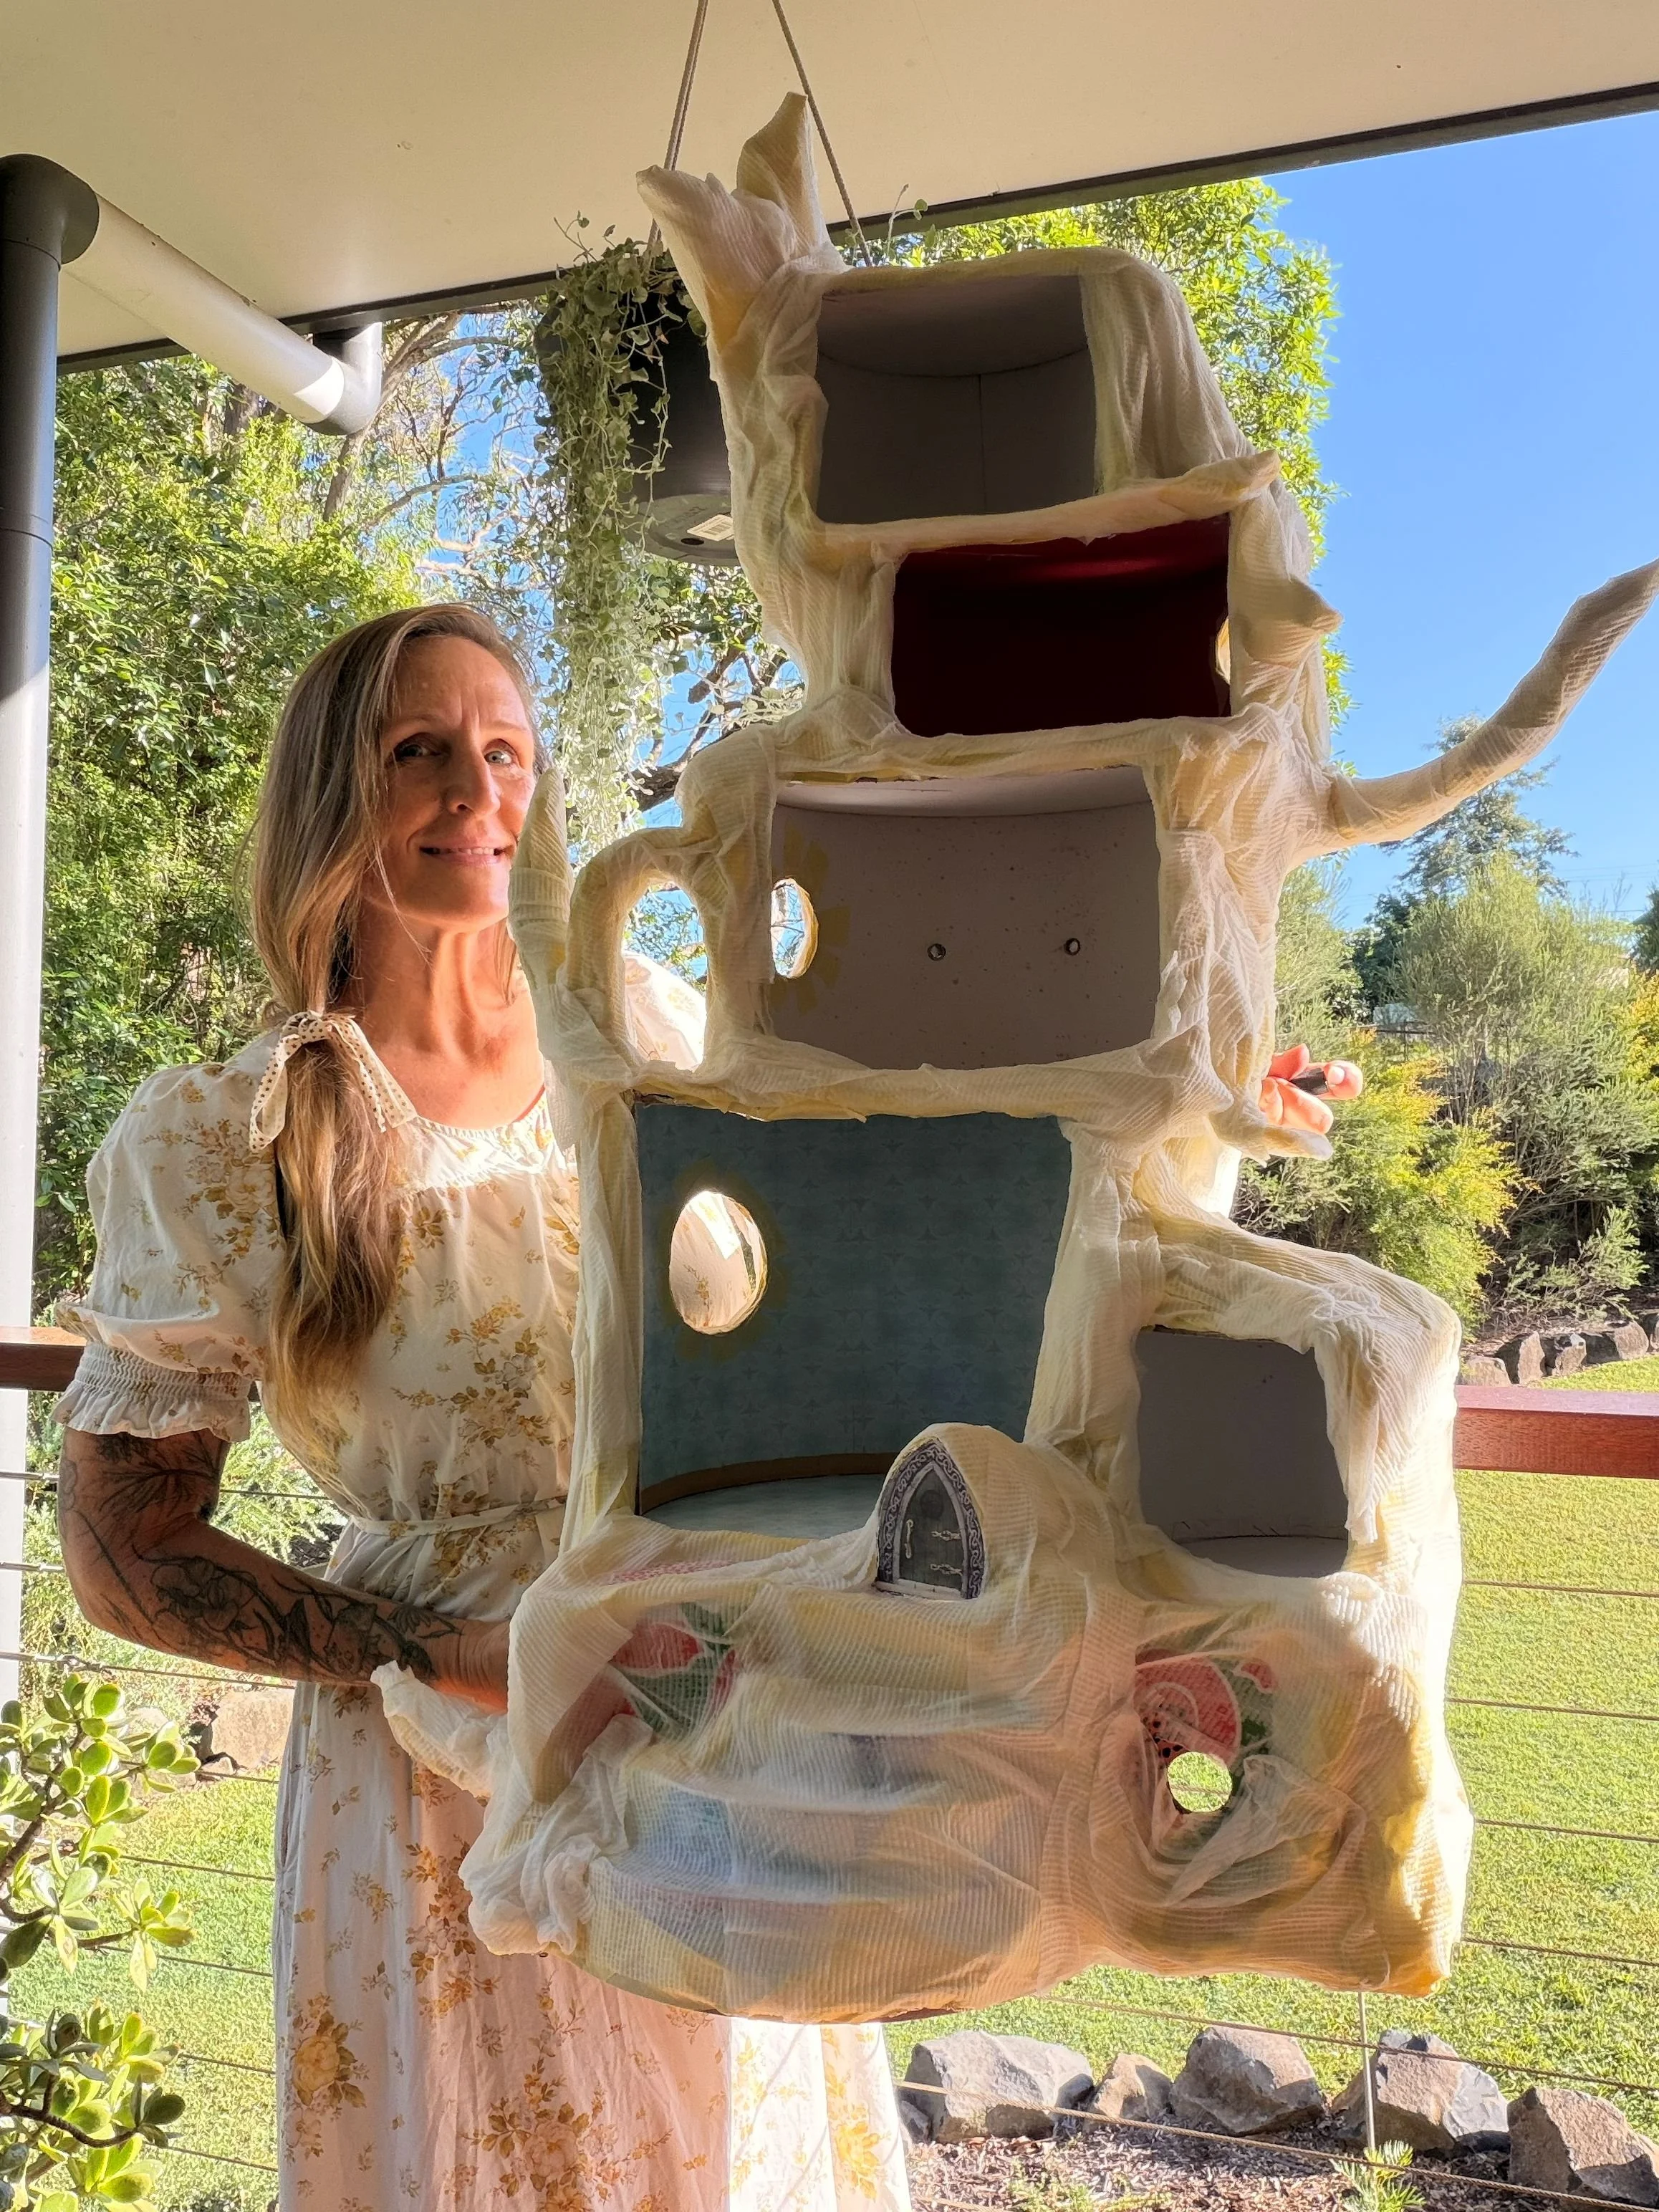
I mixed ¾ PVA glue with ¼ water to create a smooth, slightly runny mixture. Using good-quality paper towel (this makes a difference), I dipped two or three pieces at a time and layered them over the structure to create a bark-like texture.
A tip: avoid lining the pieces up too neatly—nature is wonderfully imperfect.
Gloves are helpful here, and patience too. Leave it to dry overnight (or longer) until completely set.
Day 2 – A Coat of Colour
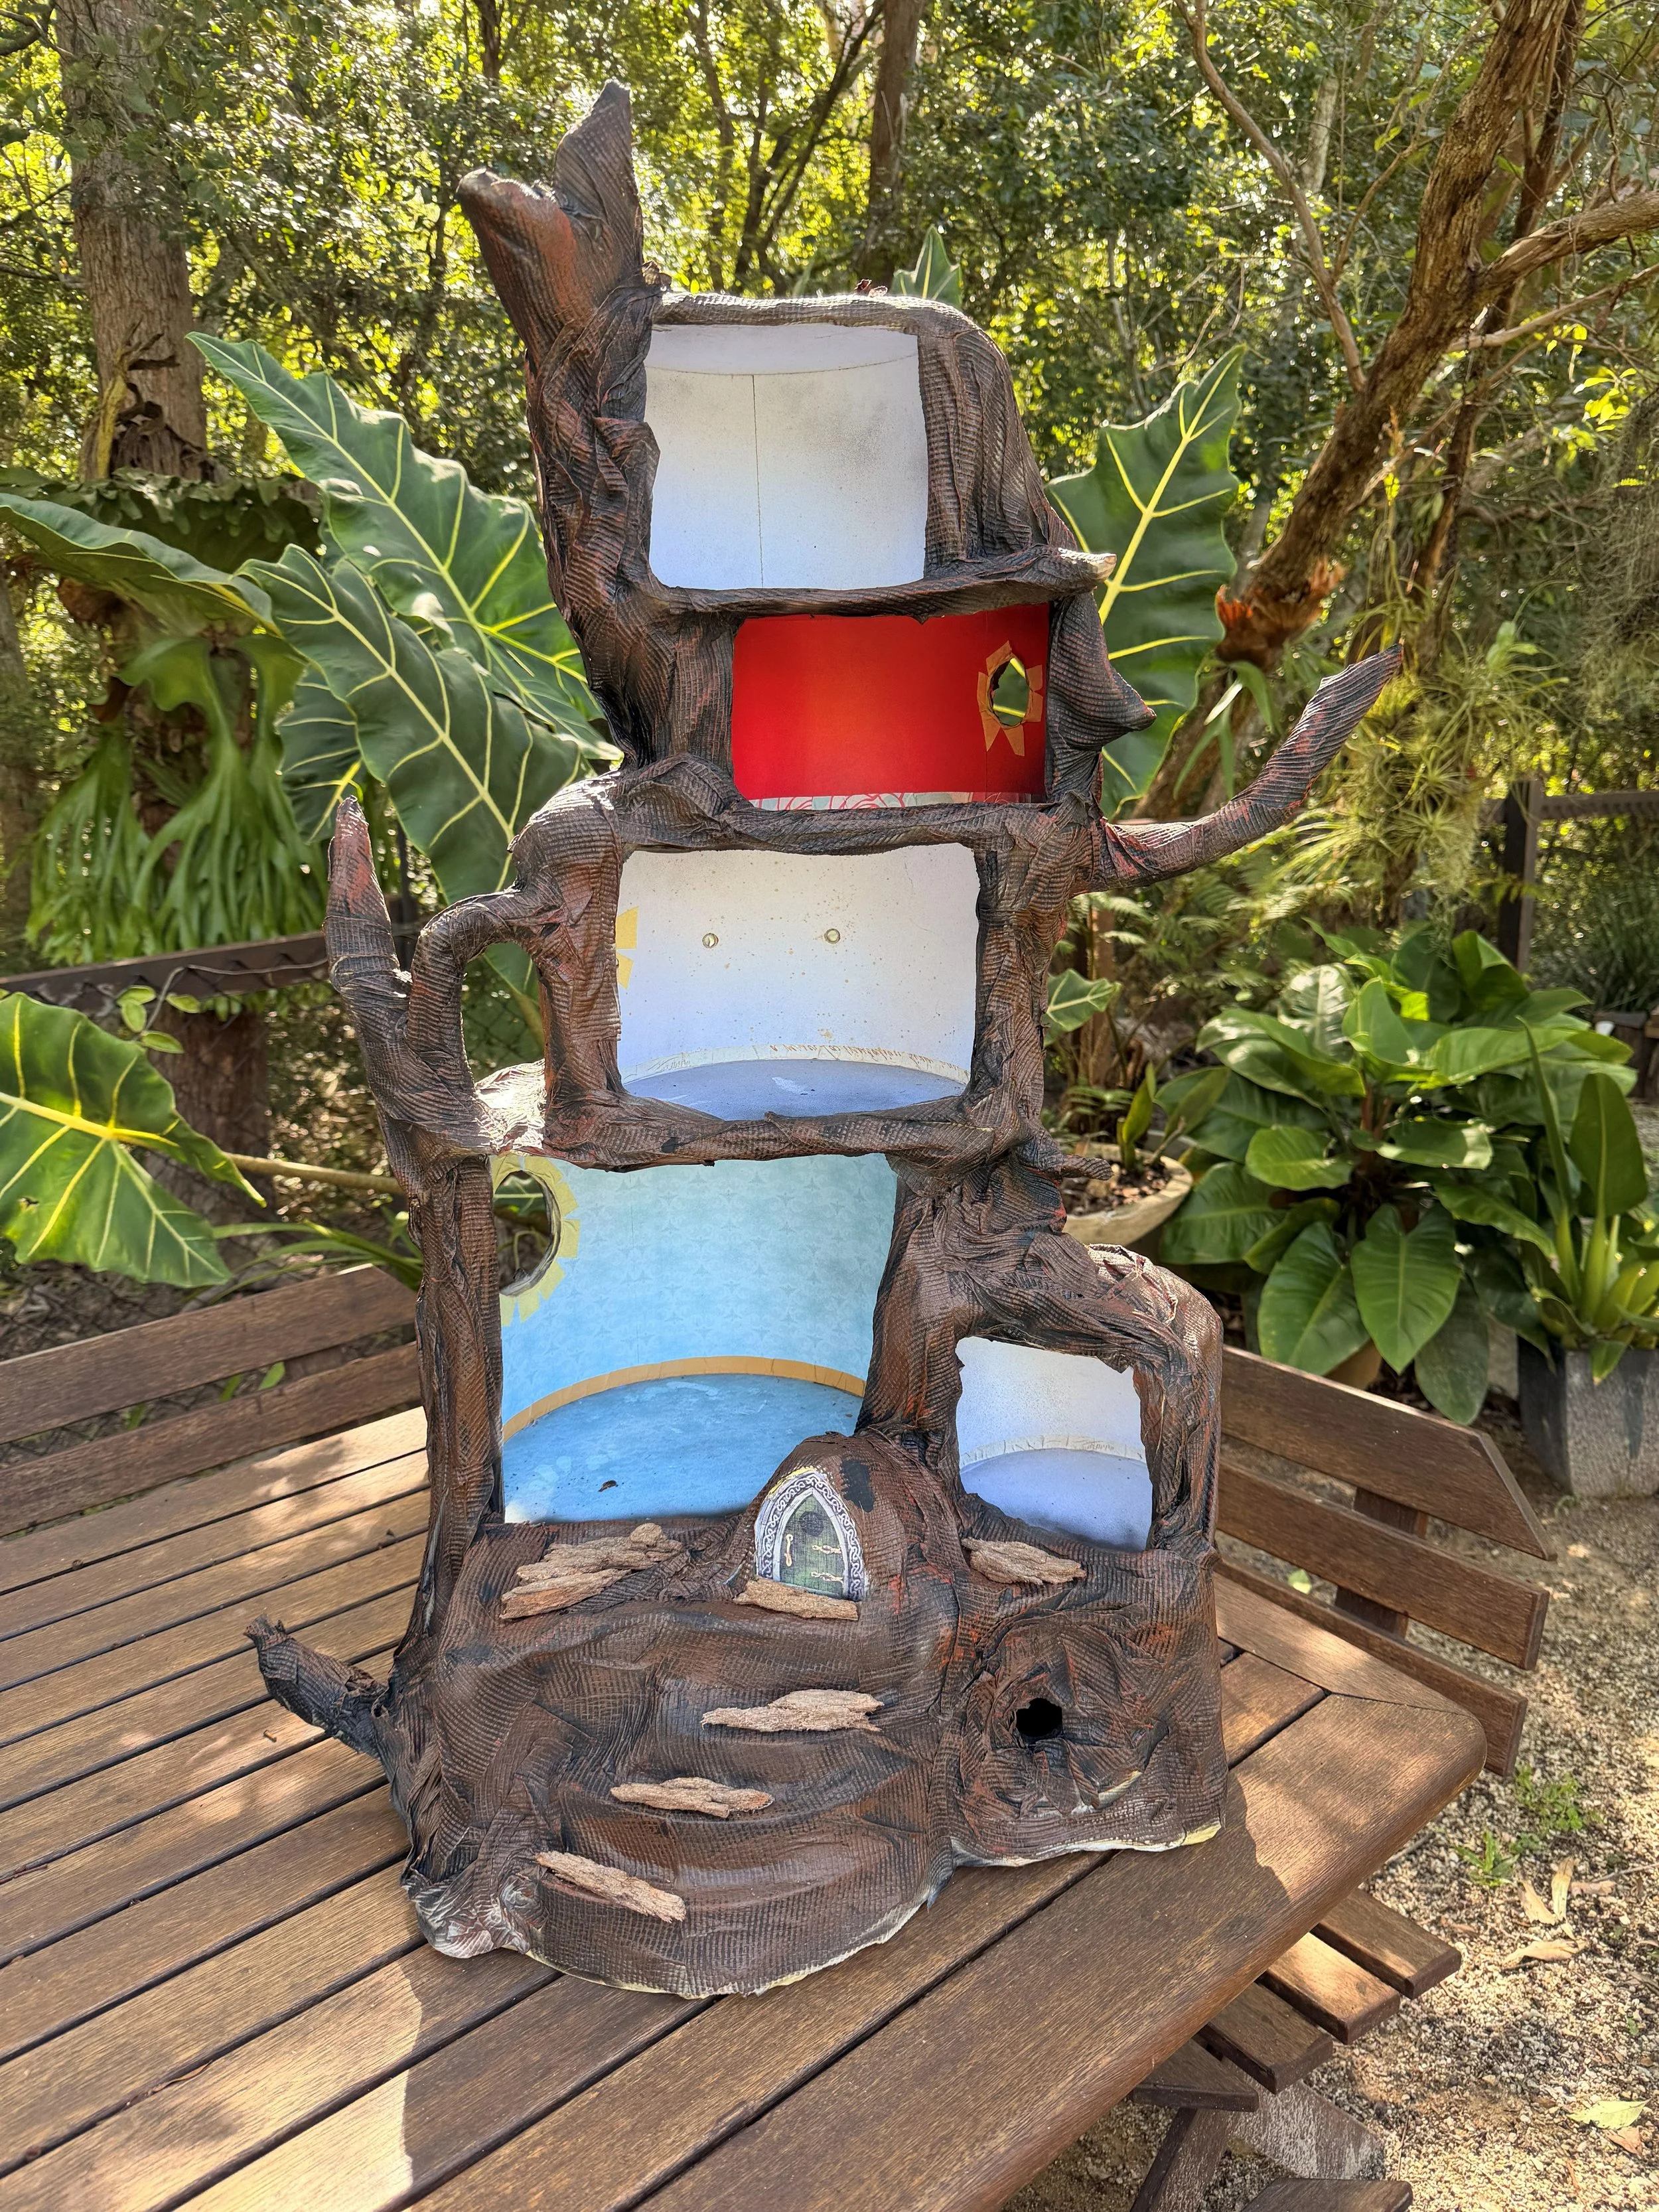
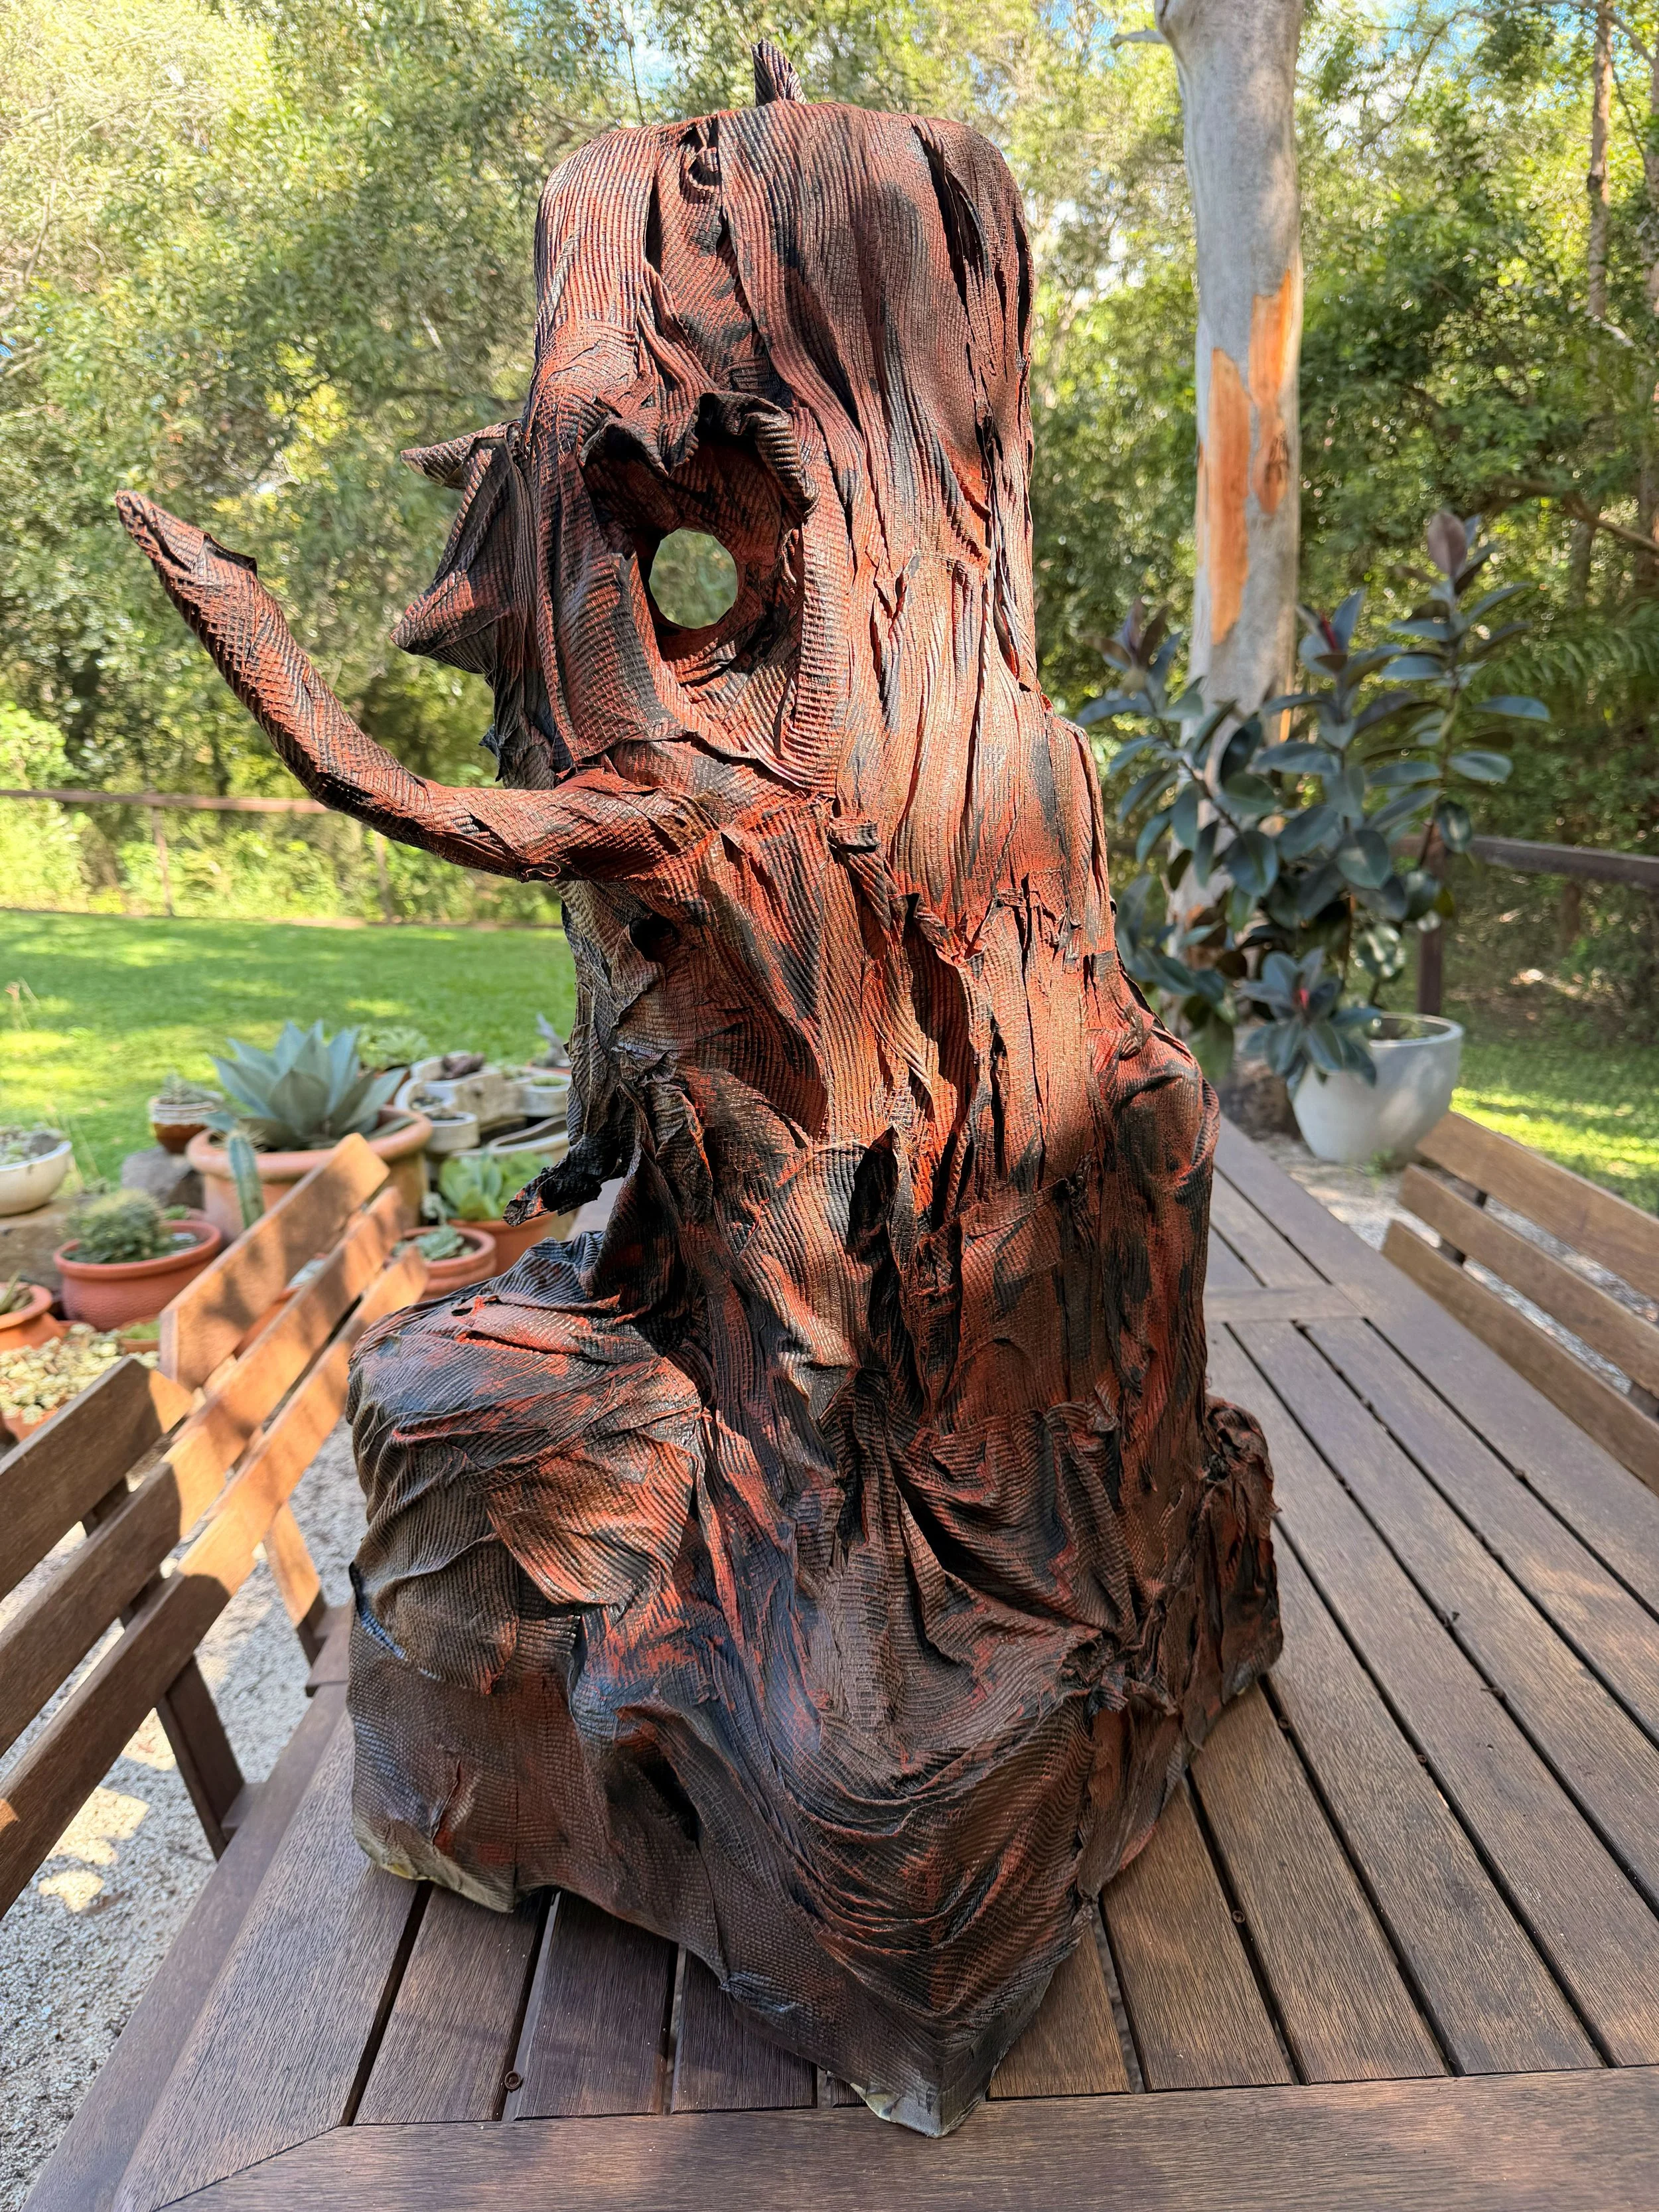
Spray painting was wonderfully satisfying. With just one can, the entire tree house was covered, instantly bringing all the textures together. Leave it to dry overnight, and admire how far it has already come.
Chapter 2 – Wallpaper and Flooring
Day 3 – Bringing the Inside to Life (6 hours)
Now for the cosy details… where the tree house truly begins to feel like a home.
The Flooring
I began by creating templates for each level using baking paper. Press it gently into place and run your nail along the edges to create a guide—this makes cutting much
easier. Once cut, I transferred the templates onto thicker cardboard to form a sturdy base. Each room was given its own character:
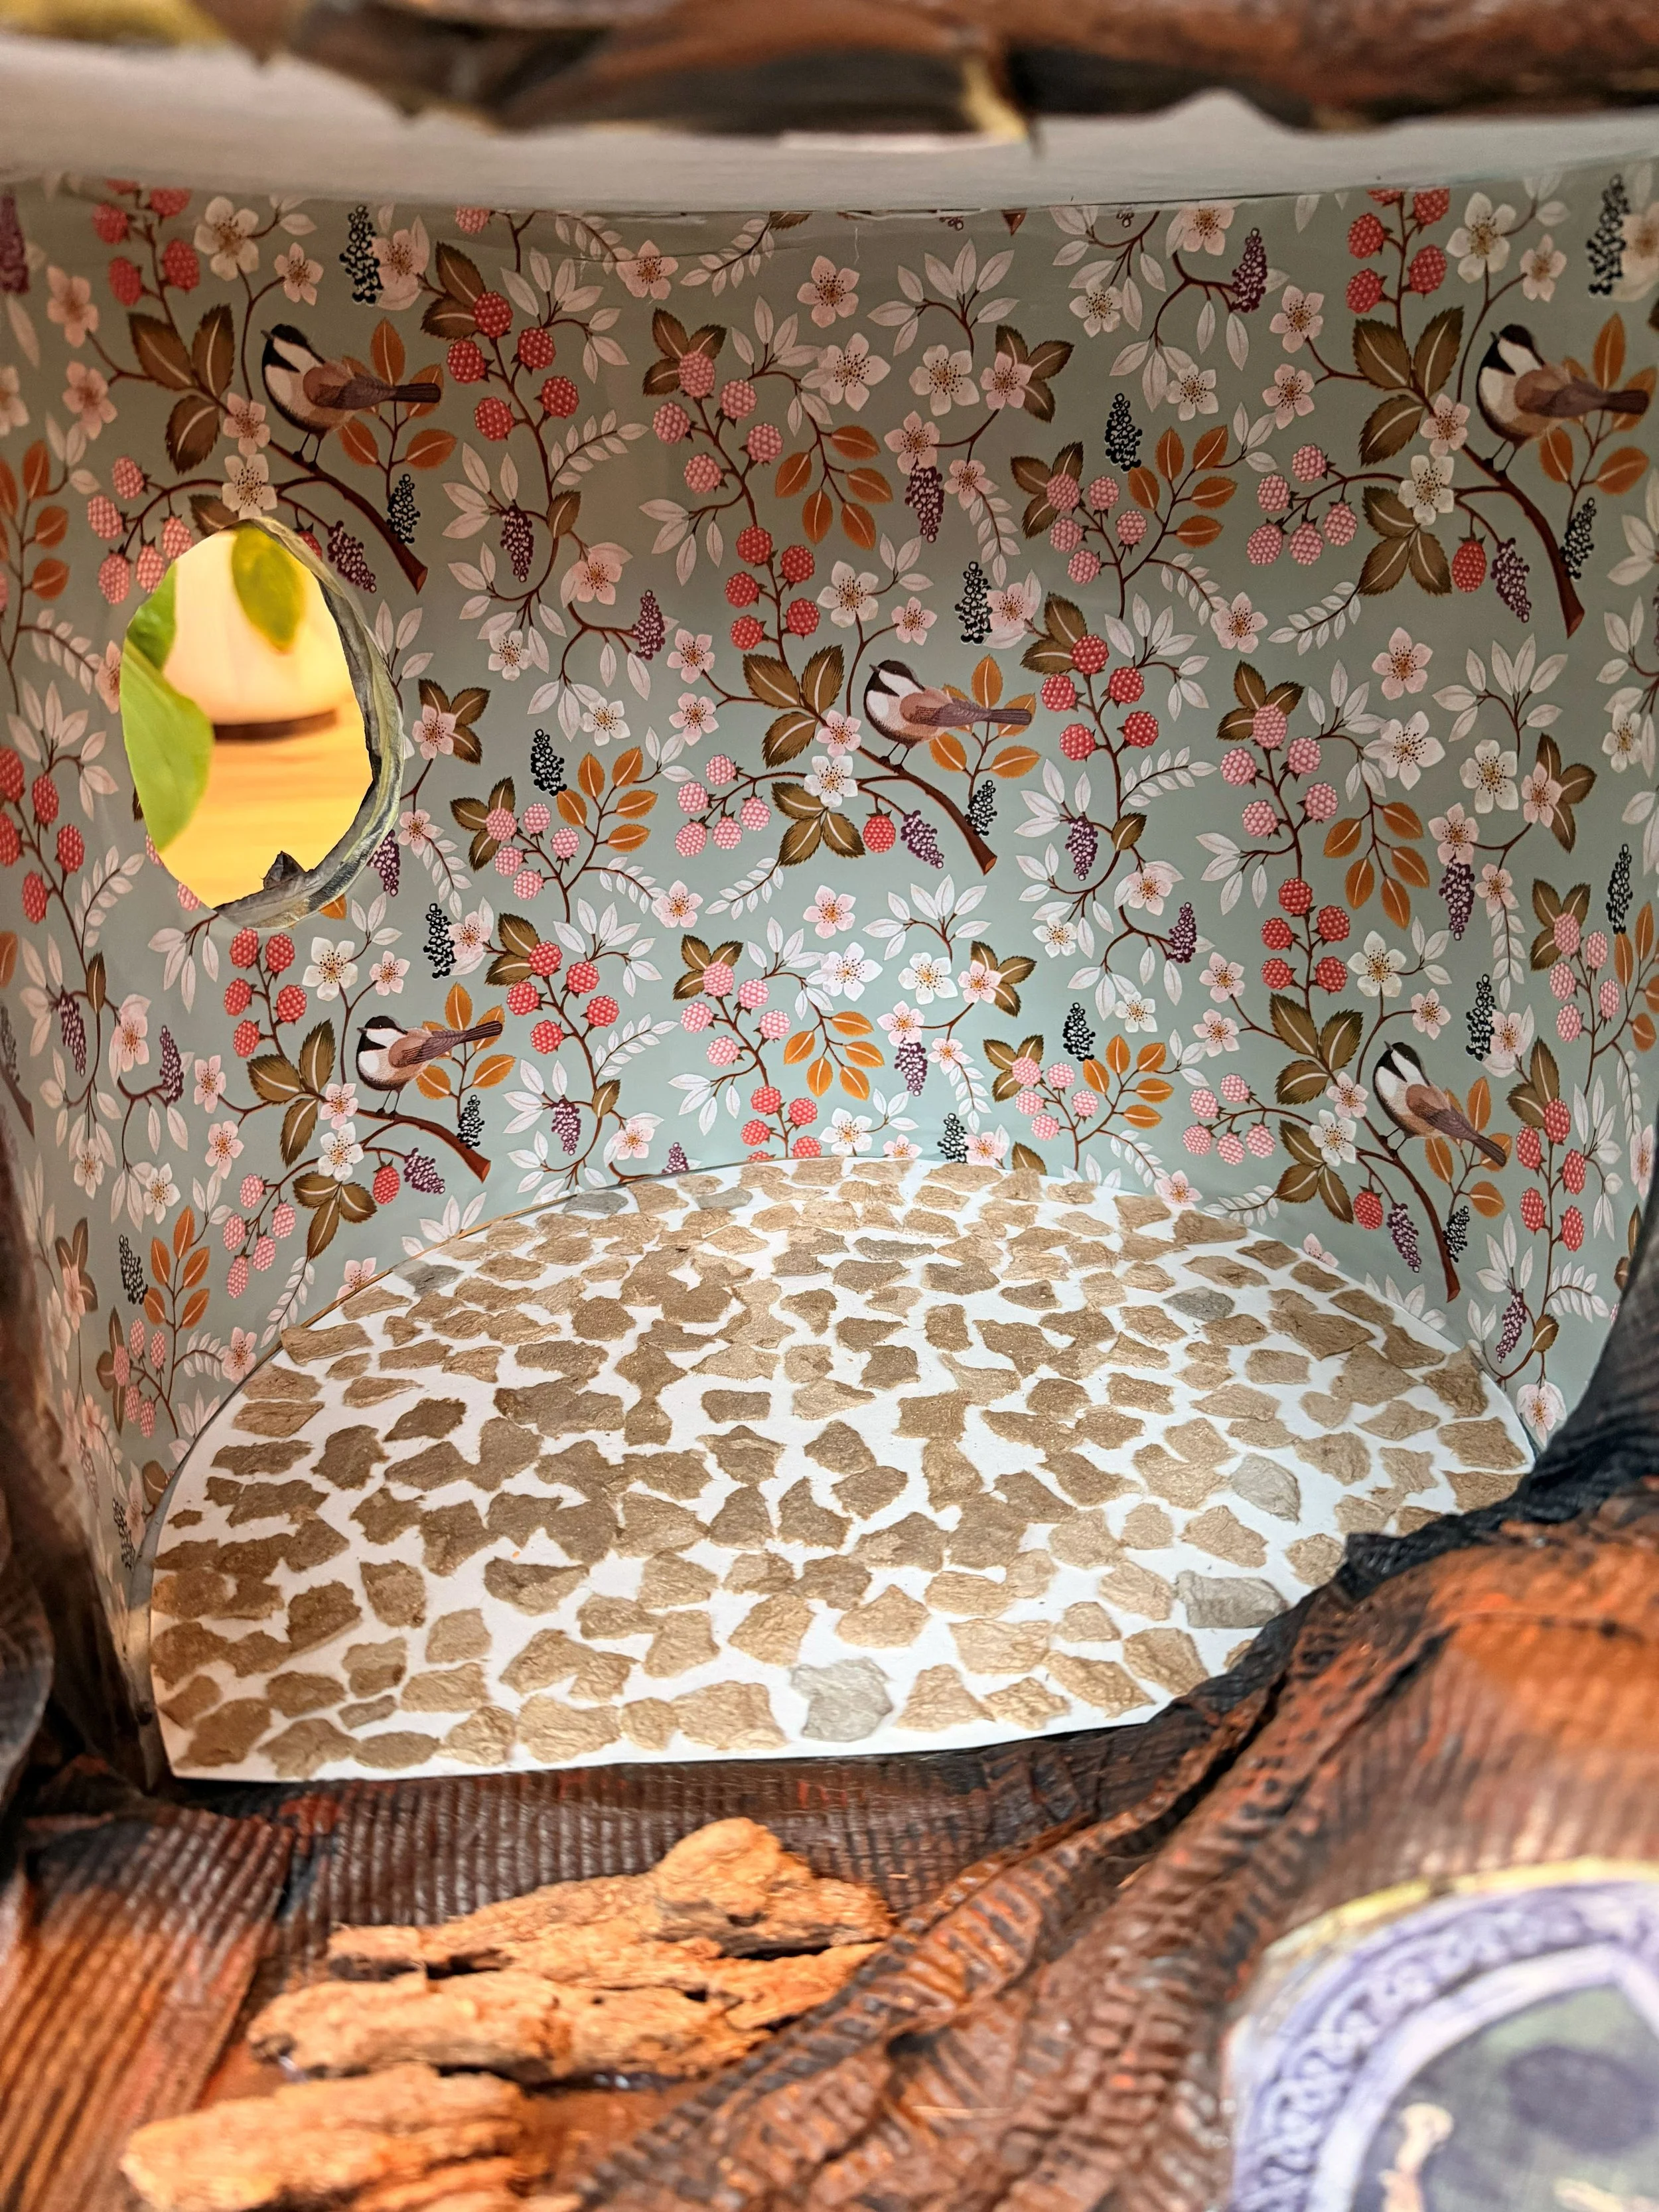
Stone flooring:
Egg cartons were torn into small, rounded pieces to resemble stones, then glued down with PVA.
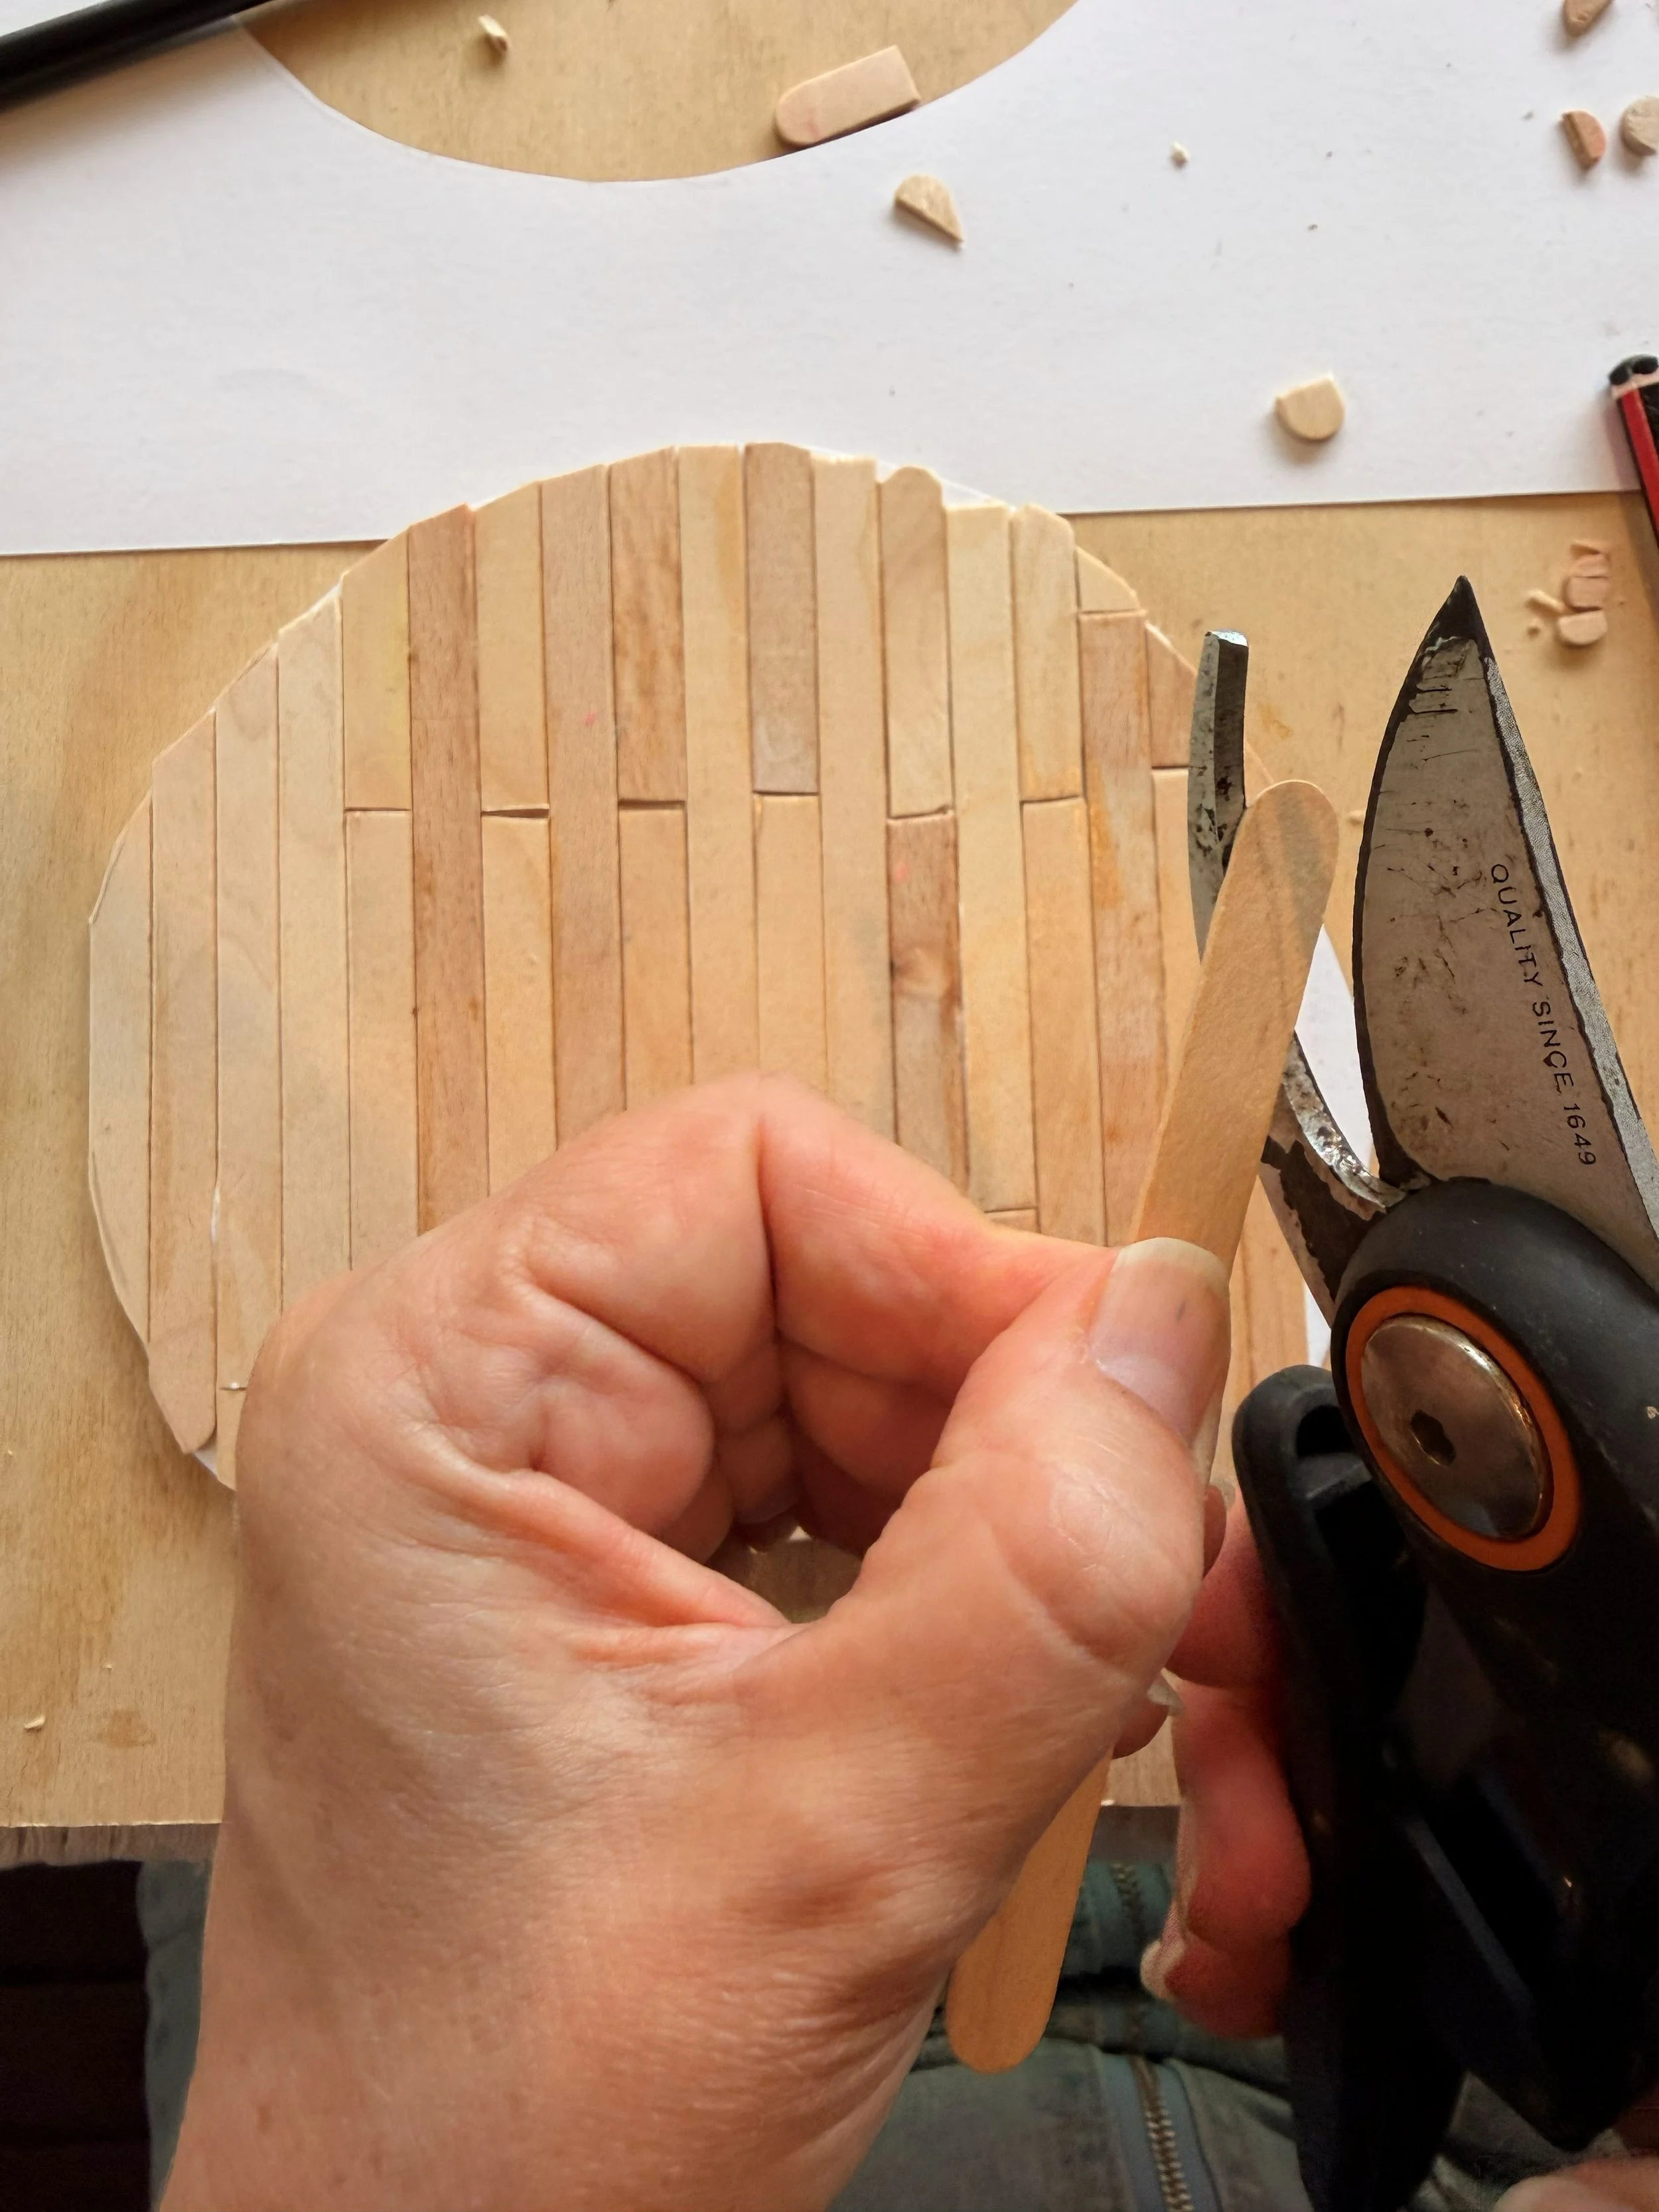
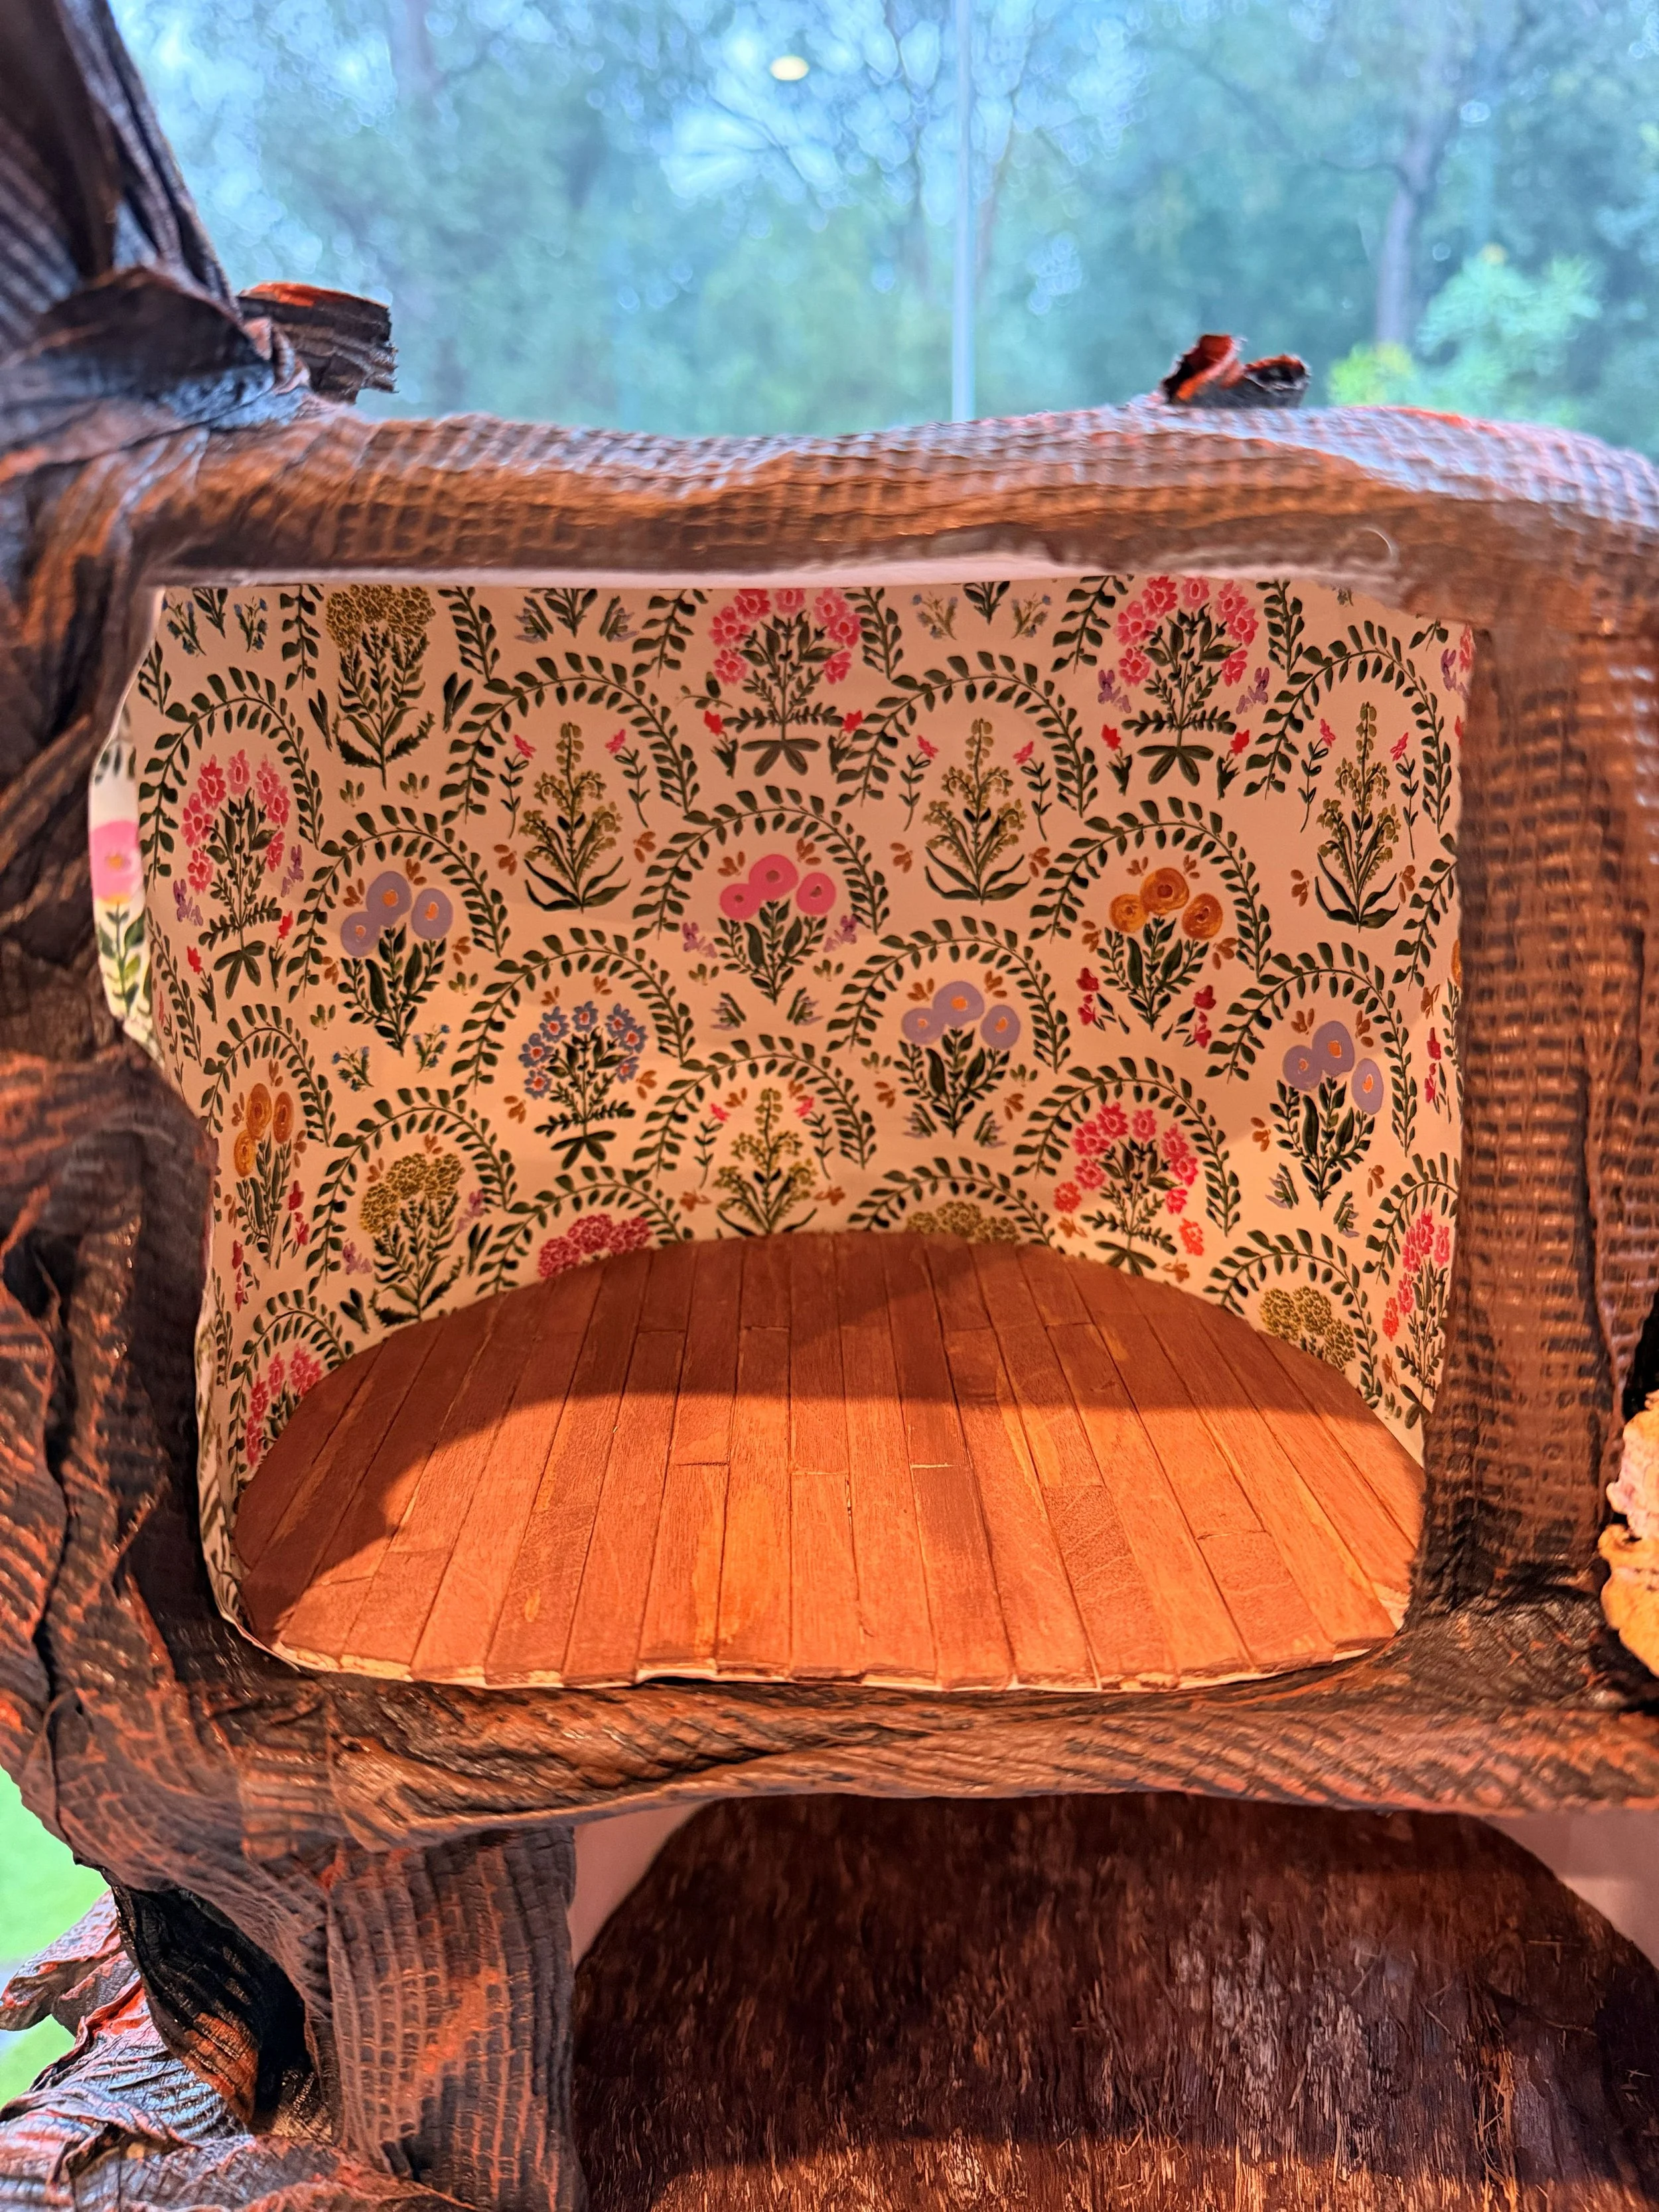
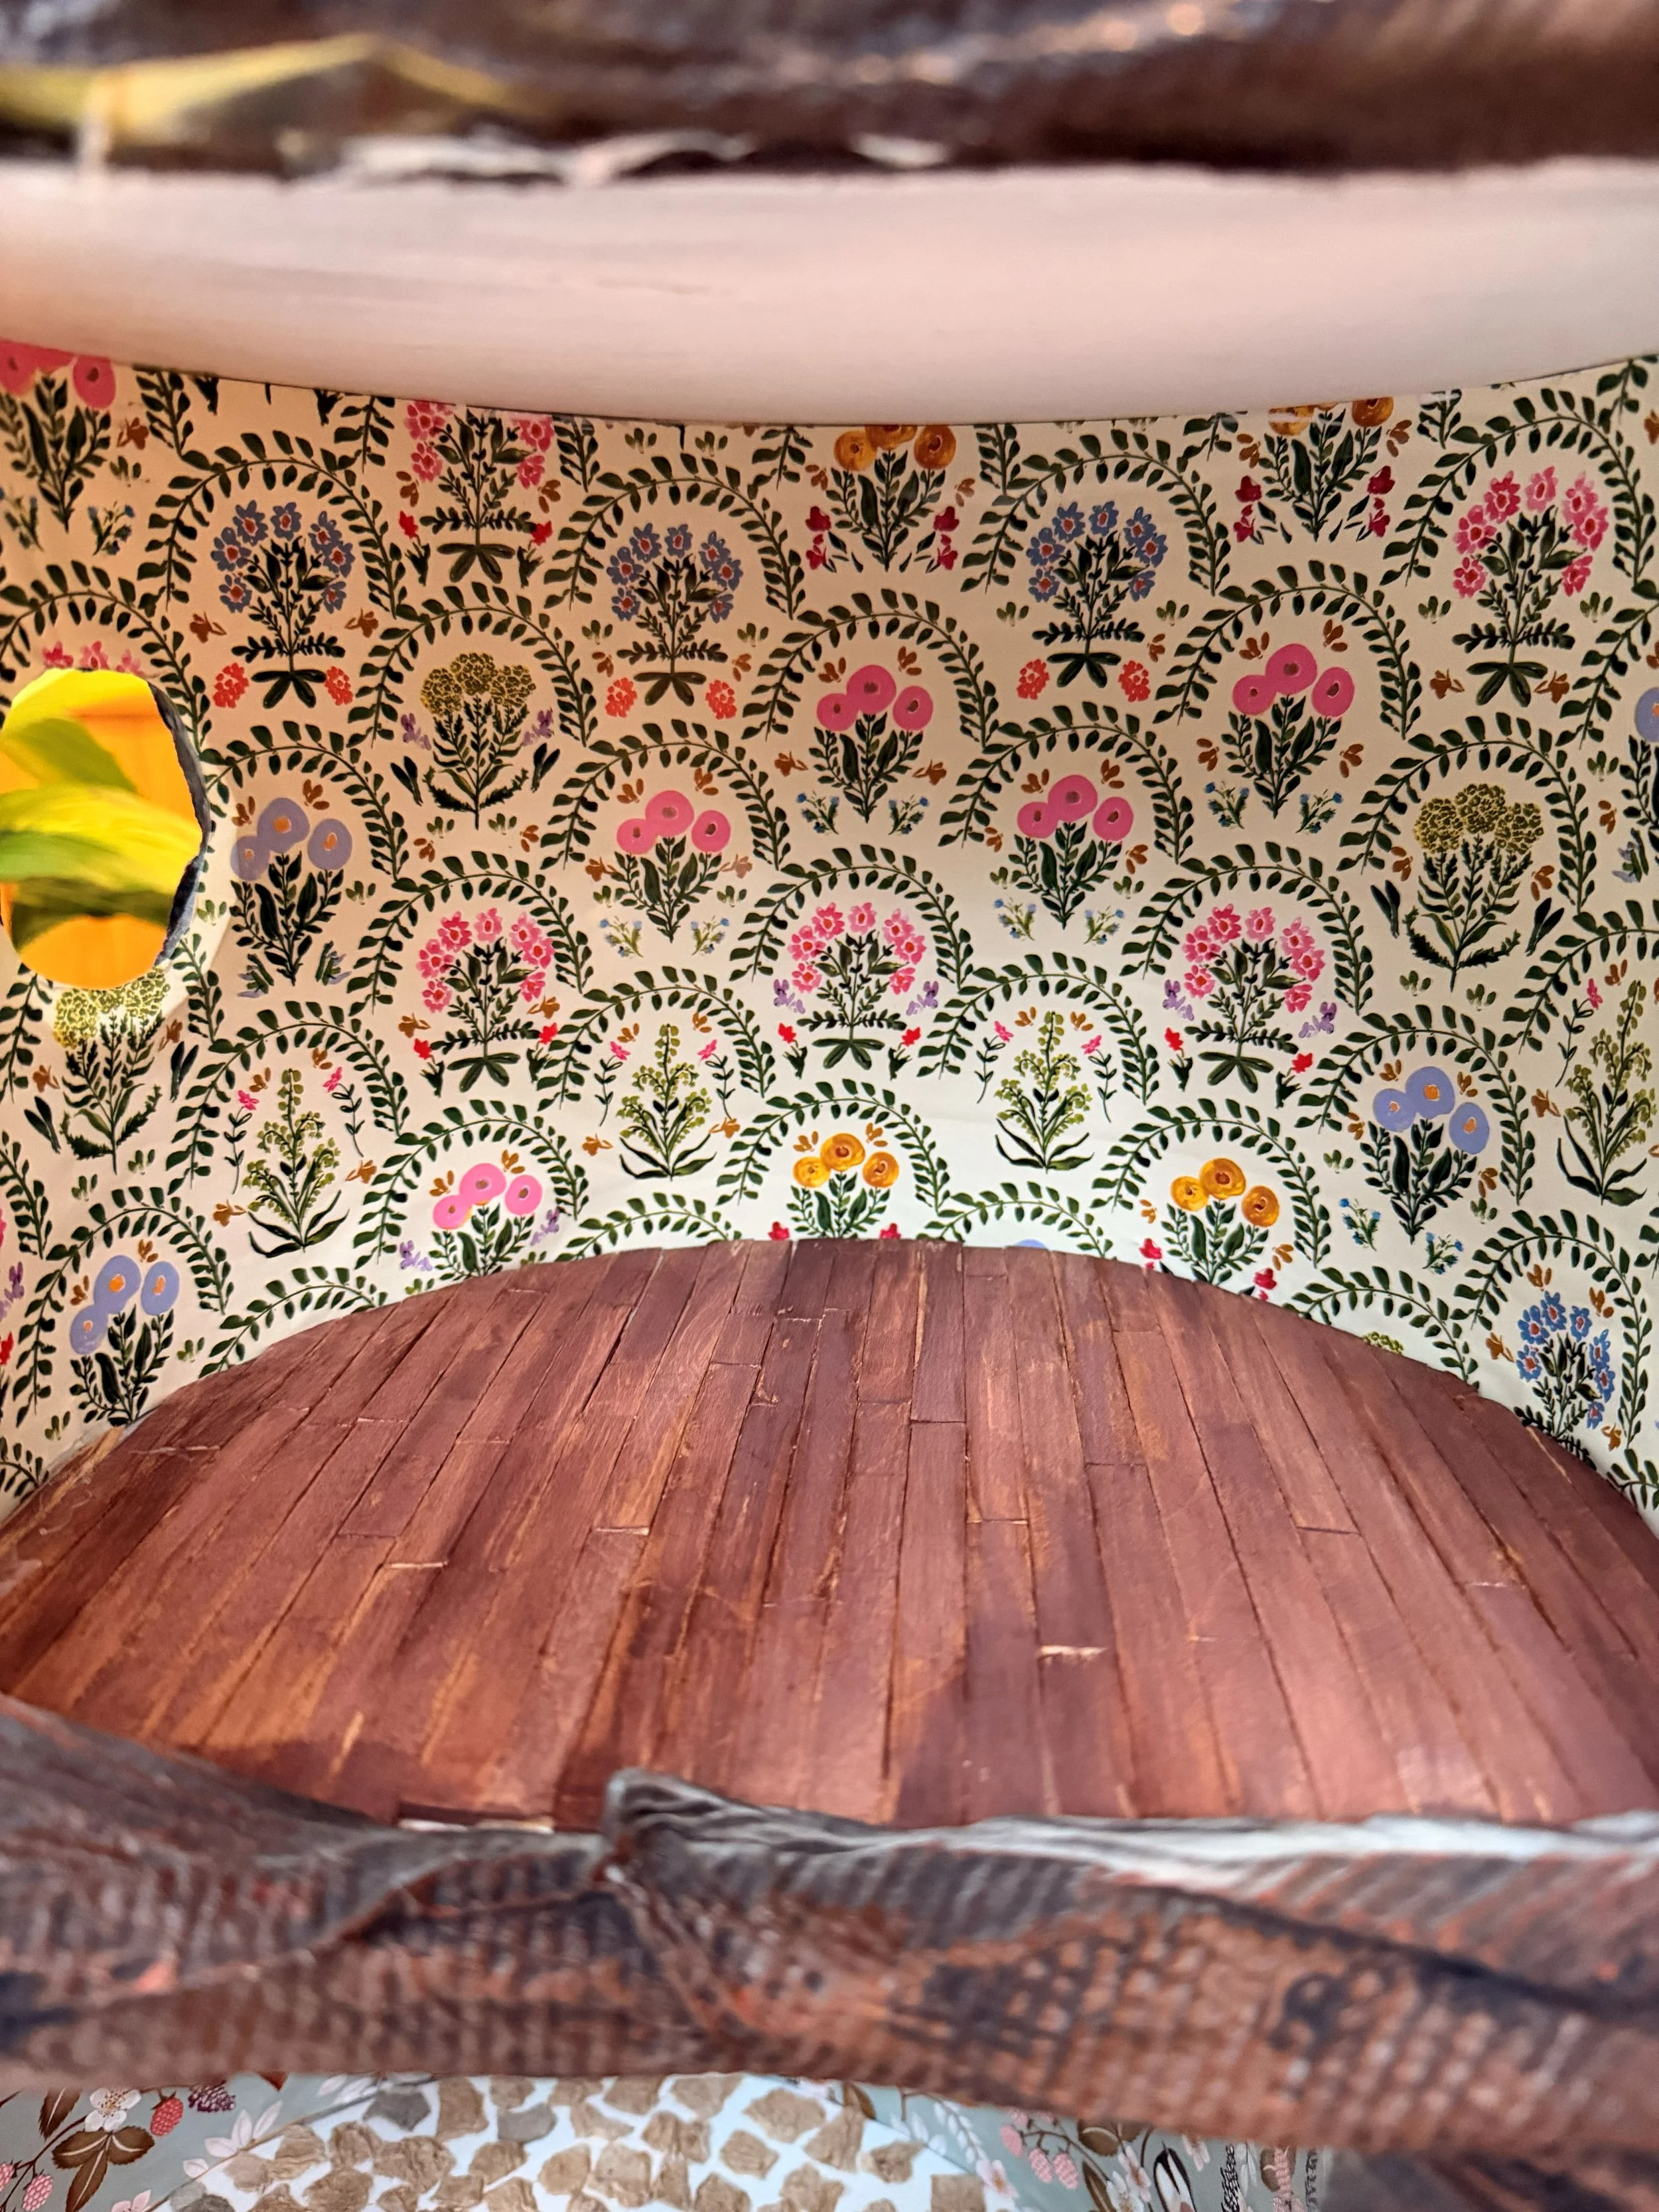
Timber flooring:
Paddle pop sticks were arranged across the template, marked, and trimmed using garden shears. Once glued and dried, they were painted brown to give a warm, polished timber look.
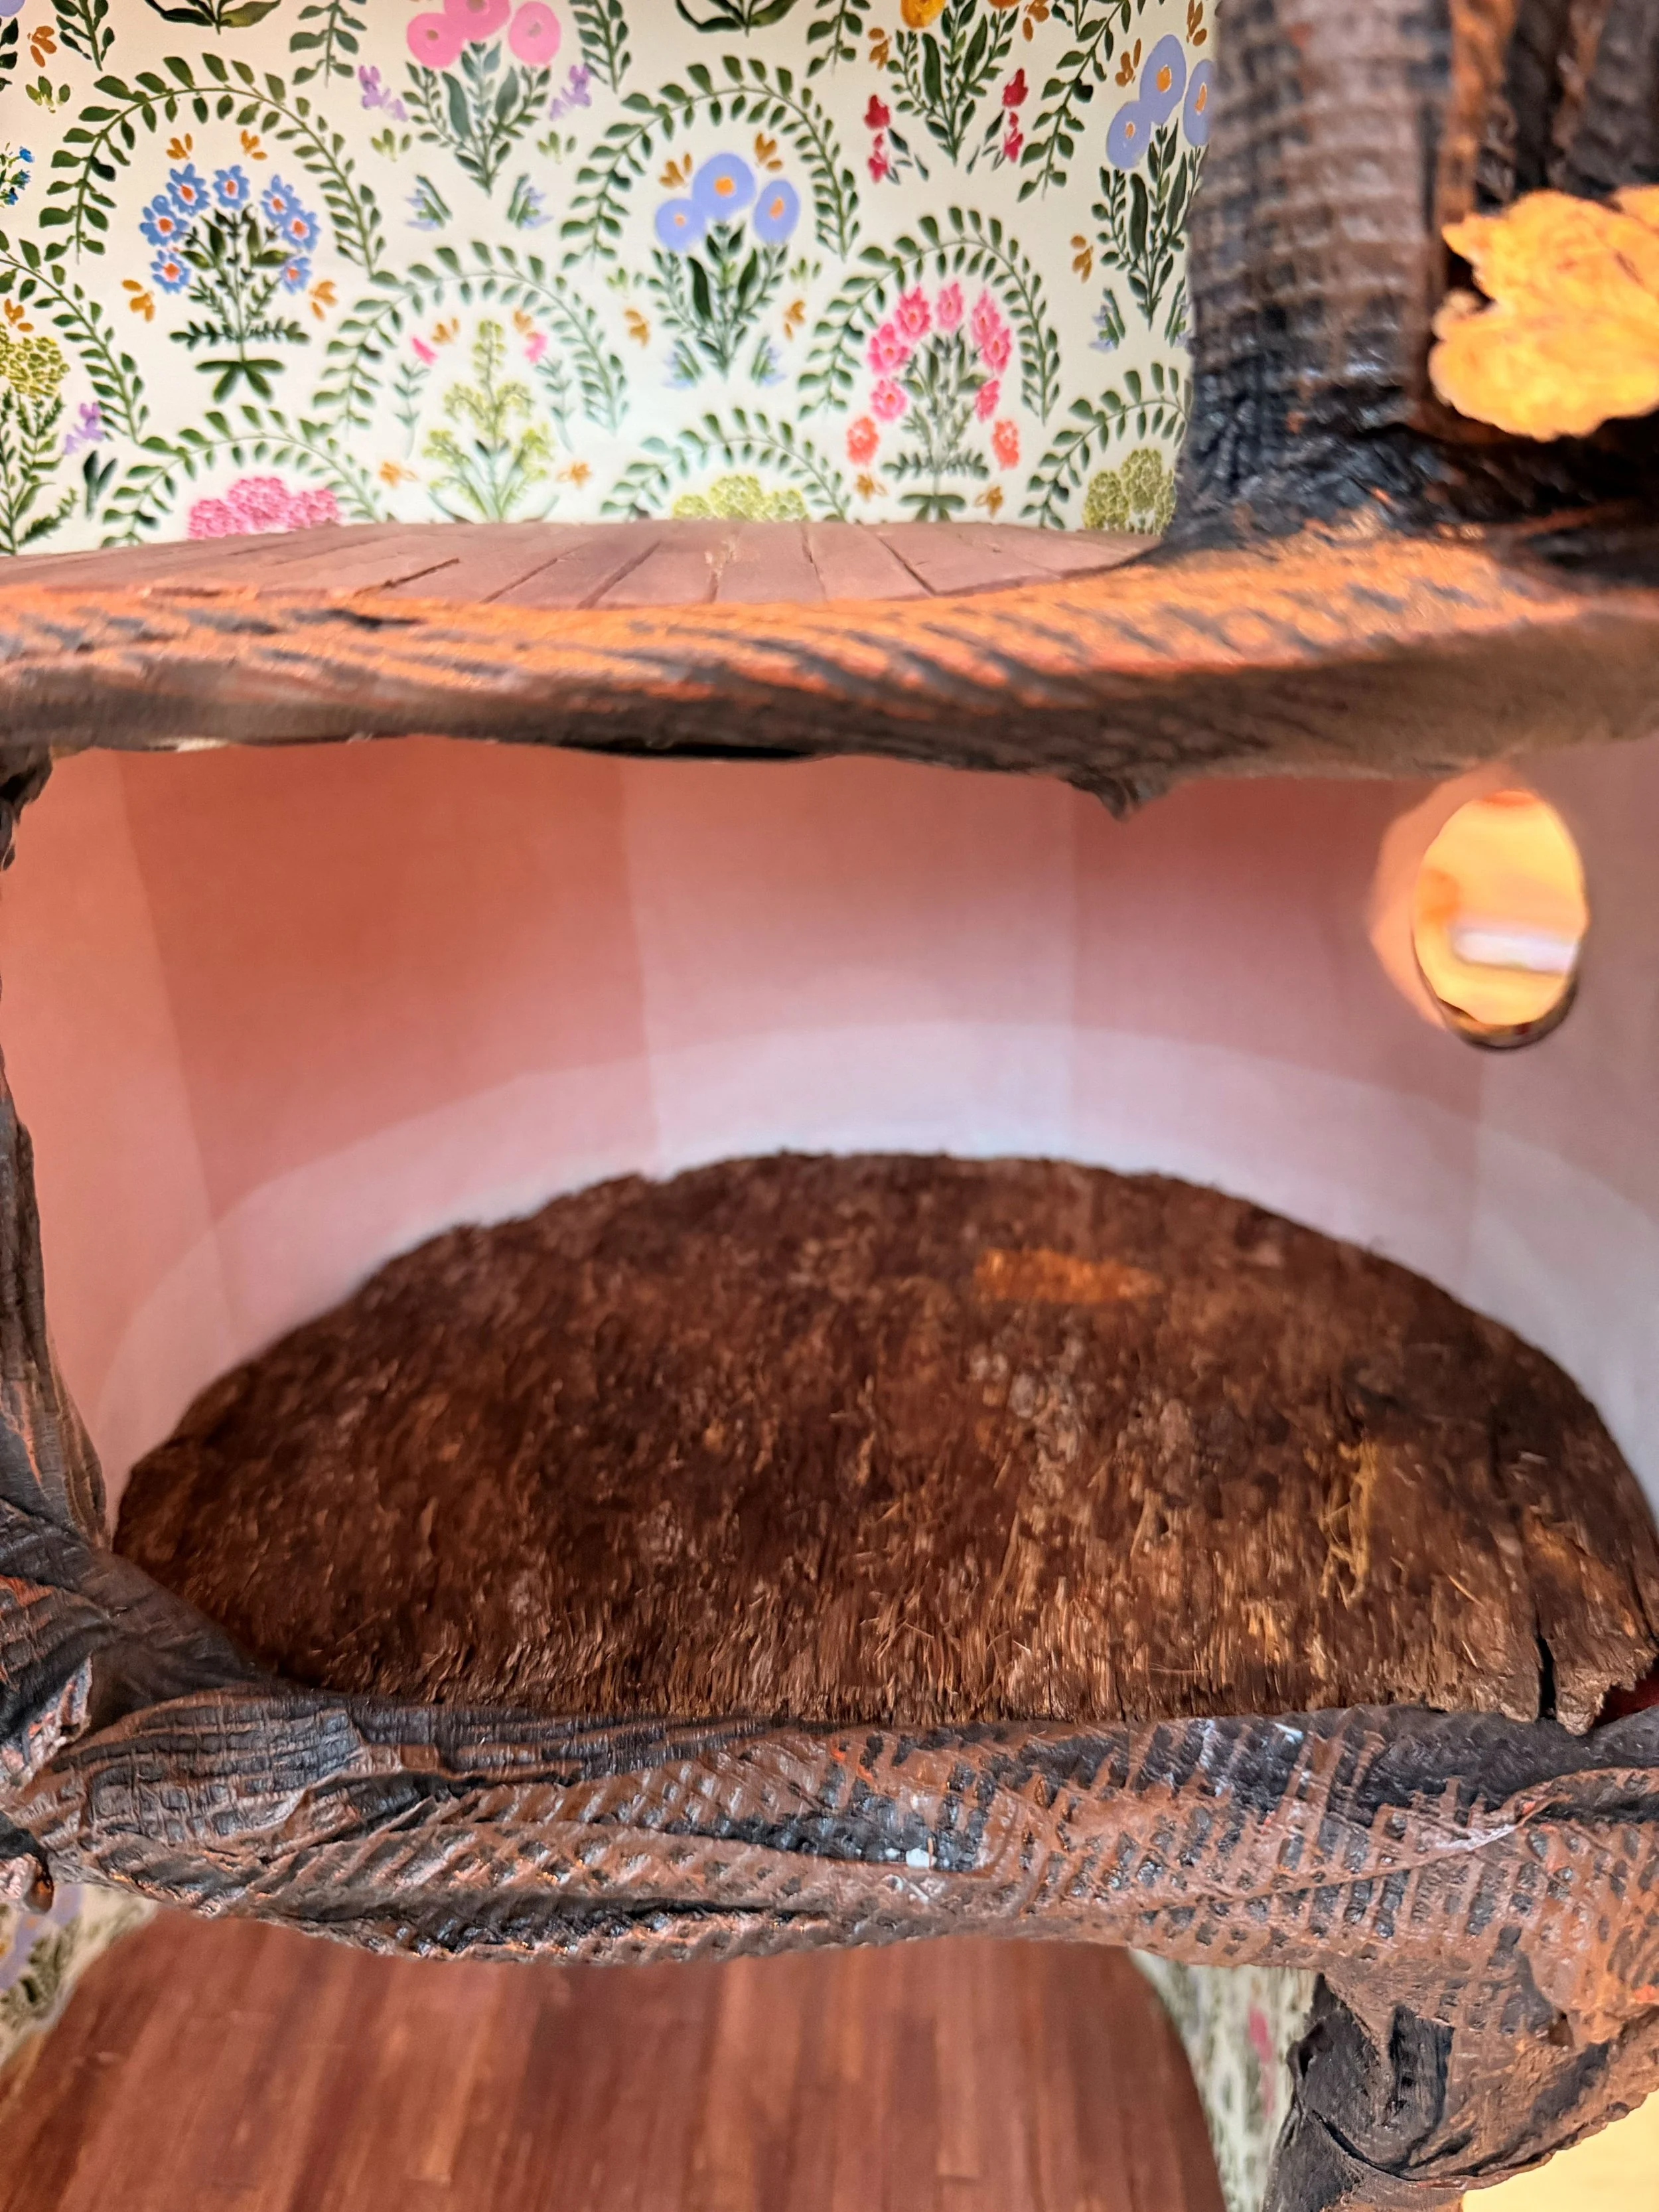
Bark flooring:
A lovely piece of bark was simply cut to size—nature doing the work for me.
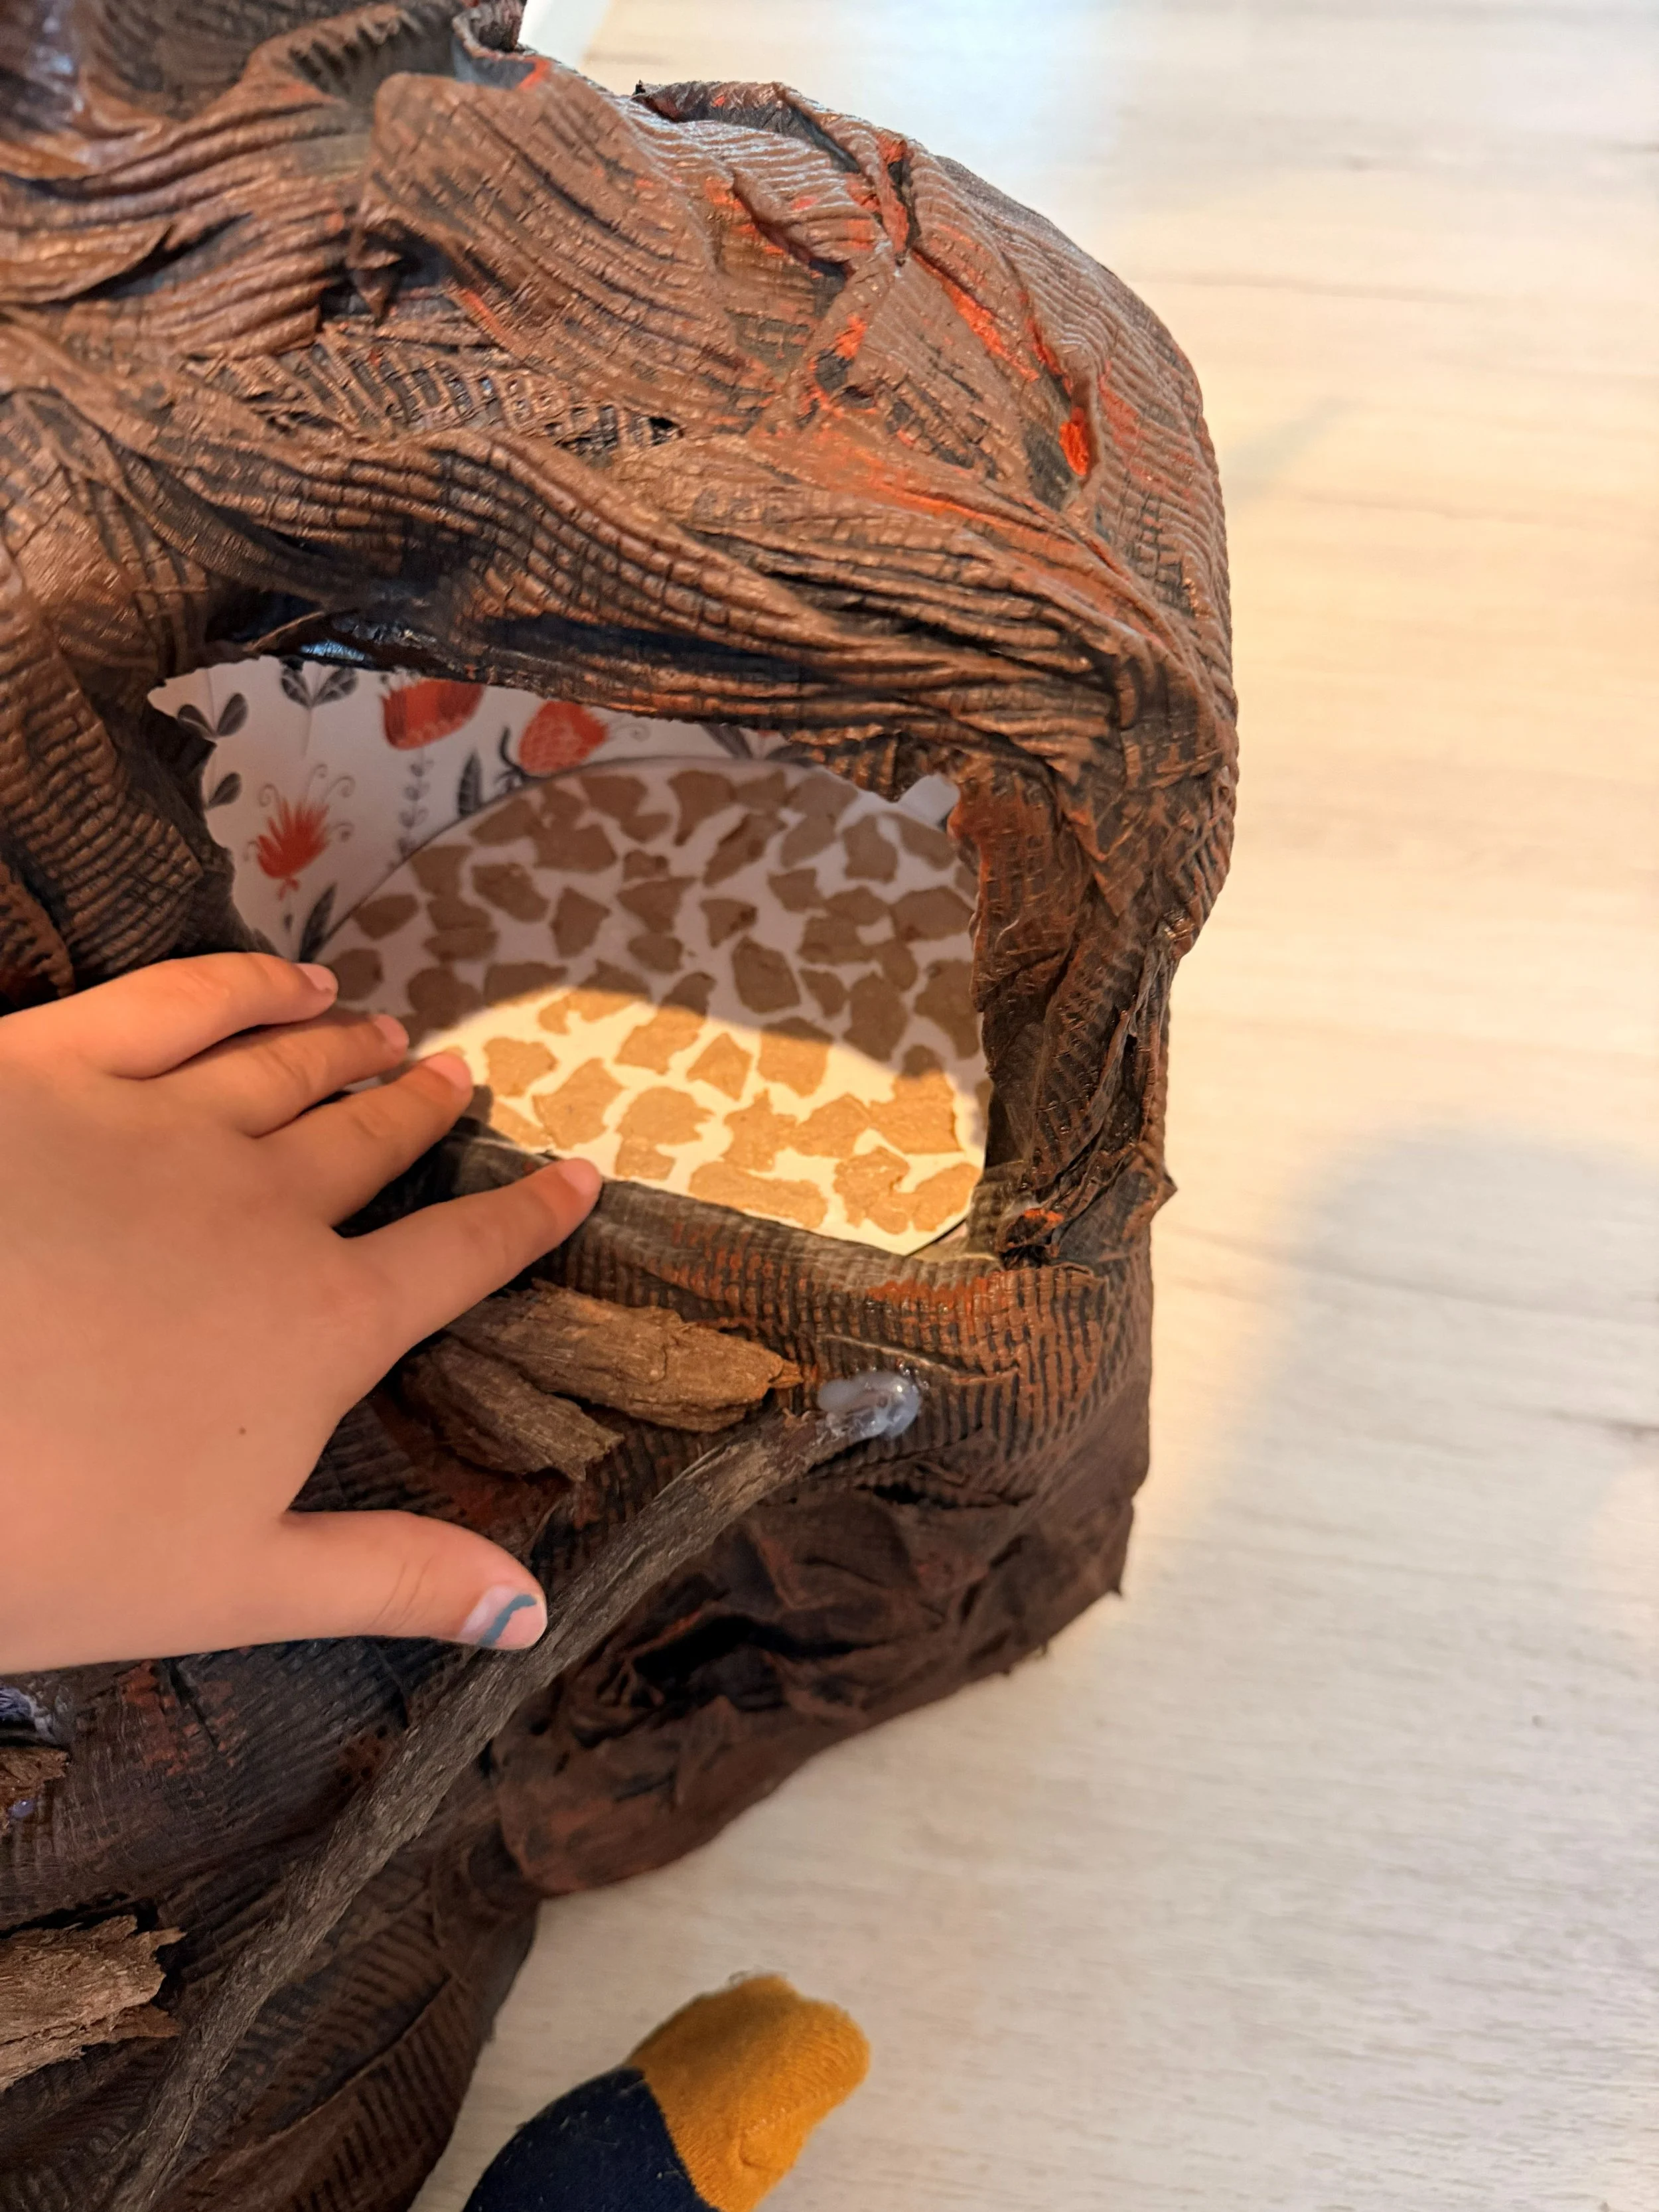
The Wallpaper
Using the same baking paper method, I created templates for each wall. Wrapping paper became wallpaper in most rooms, with a little contact paper used here and there. Each piece was carefully cut and fitted, like dressing the rooms in their Sunday best. Wallpaper was glued down first using PVA, followed by the flooring, which was secured with a hot glue gun. And just like that… the little tree house began to feel lived in. Cosy. Warm. Ready for tiny stories to unfold within its walls.
Chapter 3 – Interior Touches
To be continued…